
Another weekend, another adventure. As we drove up to Poughkeepsie this Friday, I was struck again by the beauty of the drive. As you leave the northern part of Manhattan, heading toward the Hudson Valley, you see the beautiful Hudson River on your left, flanked by the rocky Palisades across the river in New Jersey, and the lush rolling waterfront of New York.

As we wend our way up and down mountains on our trip north, there’s one specific view that Steve and I have dubbed “our favorite view.” You crest a hill and as you begin your descent, in front of you is layer after layer of mountains, growing paler as they grow more distant. On the right is a deep green valley, and ahead of you is a narrow mountain highway. To me, it’s the quintessential view of the Hudson Valley, and the reason we decided to move here in the first place. Some people are happiest by the beach, and you’d think that as former Floridians, that would naturally be us. But both of us feel the call of the mountains deep within our spirits, and we find renewal and energy the closer we get to them. We enjoy sitting in the parking lot of a McDonald’s eating an ice cream sundae and listening to the frogs and crickets. Ahhhhhhh, nature! It’s a different lifestyle from the one we currently have in NYC, and it’s one we are excited to begin full-time….once we ever finish fixing up our house!
On tap this weekend was another fun weekend of kitchen demo. After last weekend’s adventure, Steve and I made a deal: he would demo the kitchen and I would continue work on the second floor. I have discovered that I have a strong distaste for demo work. I hate the churning dust and debris, the risk of rusty nails, and the loud and incessant hammering. I don’t particularly like watching pieces of my house fall down either. Steve, on the other hand, really enjoys demo work. He loves experimenting to find JUST the right place to hit the wall to make a big chunk of it fall down and challenges himself to bring down the biggest piece possible. He appreciates the immediacy of the results he gets. And let’s be honest, big hammers and big messes? A boy’s dream come true!
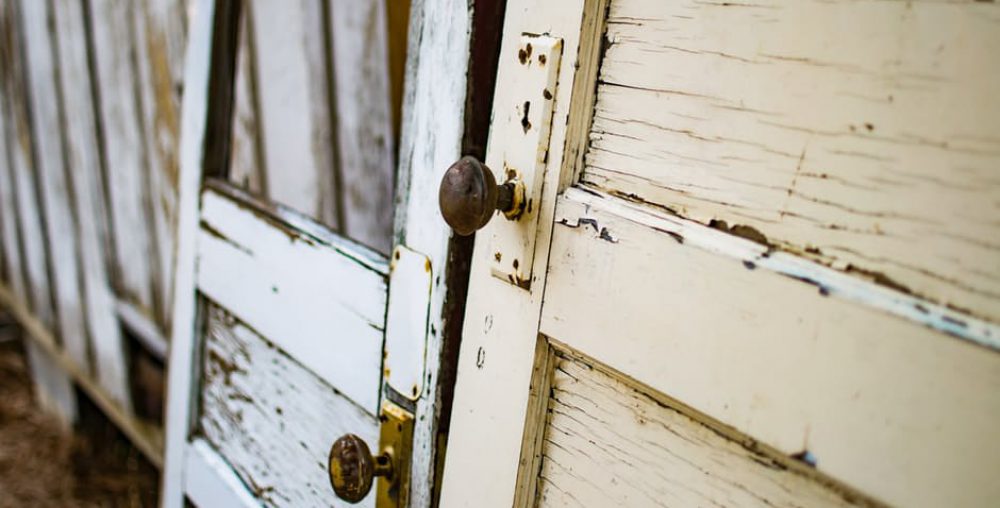
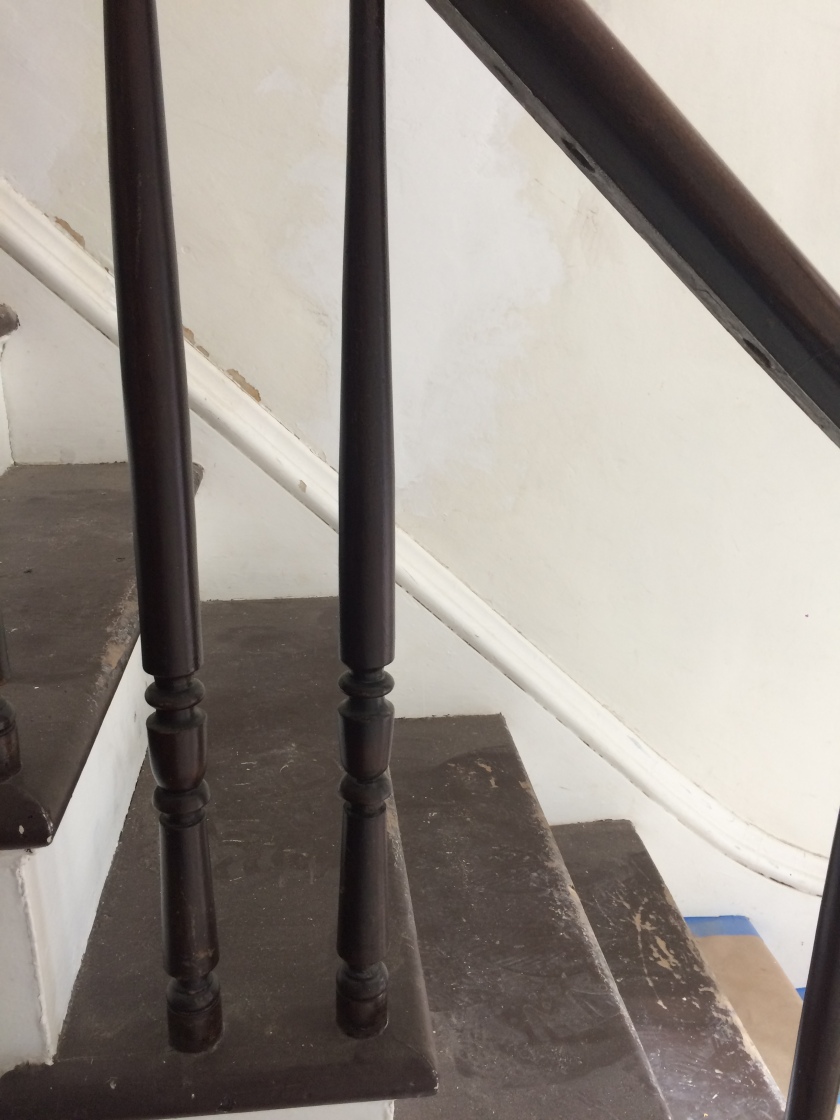
So, we set a goal for ourselves that Steve would finish tearing down the walls in the kitchen and laundry/half bath, while I had other projects on my to-do list. First up for me? Get cracking on stairwell repair. We have a once-beautiful staircase that greets you when you walk in the front door. Over time, the non-caring previous owners have broken a bunch of spindles: 6 to be exact. It looks like a 6-year-old’s mouth with gaps of missing teeth.
To replace the spindles, you must find someone who has a copy lathe. This machine takes the original spindle and then does computer magic to create a replica and then the woodworker puts in a block of wood and a few hours later…voila….new spindles. We’ve been looking for a person to help us with this project for a little while. First we tried NYC, but the few people I reached out to either never checked back in or were rude when they called back. Finally, this week I found a company in the Hudson Valley who said they’d probably be able to help.
This group is located in Golden’s Bridge, about an hour away from the house. Even better, they are open on the weekends! So at 8:00 on Saturday morning, I called to confirm they would still be there in an hour, then loaded up a sample spindle that we tapped out of its hidey-hole in our stairwell, and took a scenic drive south.
The man at the stairwell store was happy to help, and even happier when he discovered that we wanted these replicas made from mahogany (the original wood used) and that we needed 6 of them….at $70 each. Gulp! We actually need 5 of a long size and 1 of a shorter size. A previous contractor told us if we brought the long one and the measurements for the short one, that would be enough. Nope. They need an actual short one too, which I didn’t bring because it was a lot harder to get out. The first one we removed was missing the side of the stair tread, so it was easy to tap out with a rubber mallet. All the short ones are still firmly inserted in the middle of a stair tread. So, when I come back to pick up the 5 long spindles, I’ll bring a short one for them to replicate as well. He showed me how to carefully remove the “return” of the stair tread (the side bit) so I can get the short one out. I haven’t tried yet.
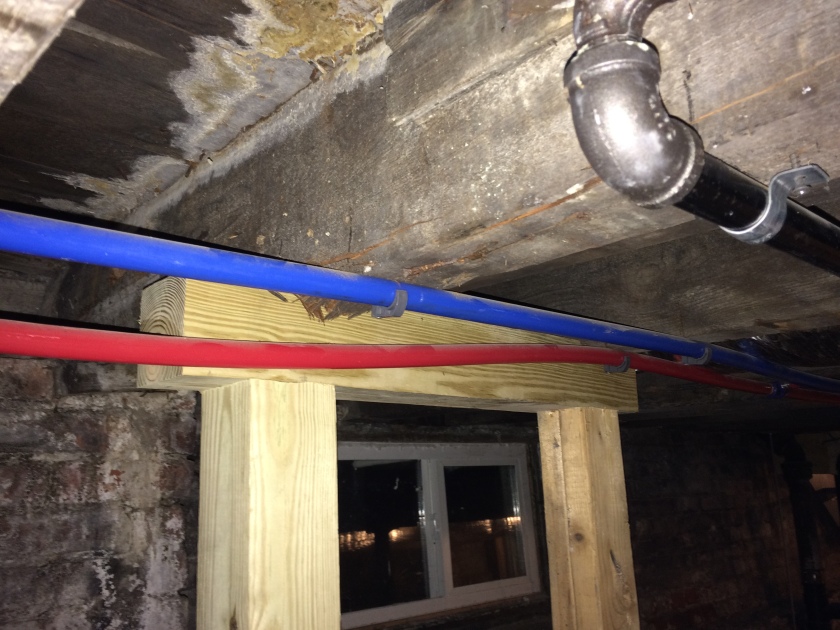
Meanwhile, back at the ranch, Steve was dividing his time between ripping down walls and helping Jason, who had returned this weekend with his lolly columns to bolt our foundation in place. As they examined the floor, they decided that they would actually be able to lower the foundation just a bit from the height Jason had achieved during the week. So they lowered the house jacks a bit, then wrestled for the majority of the afternoon to install new beams and new lolly columns.
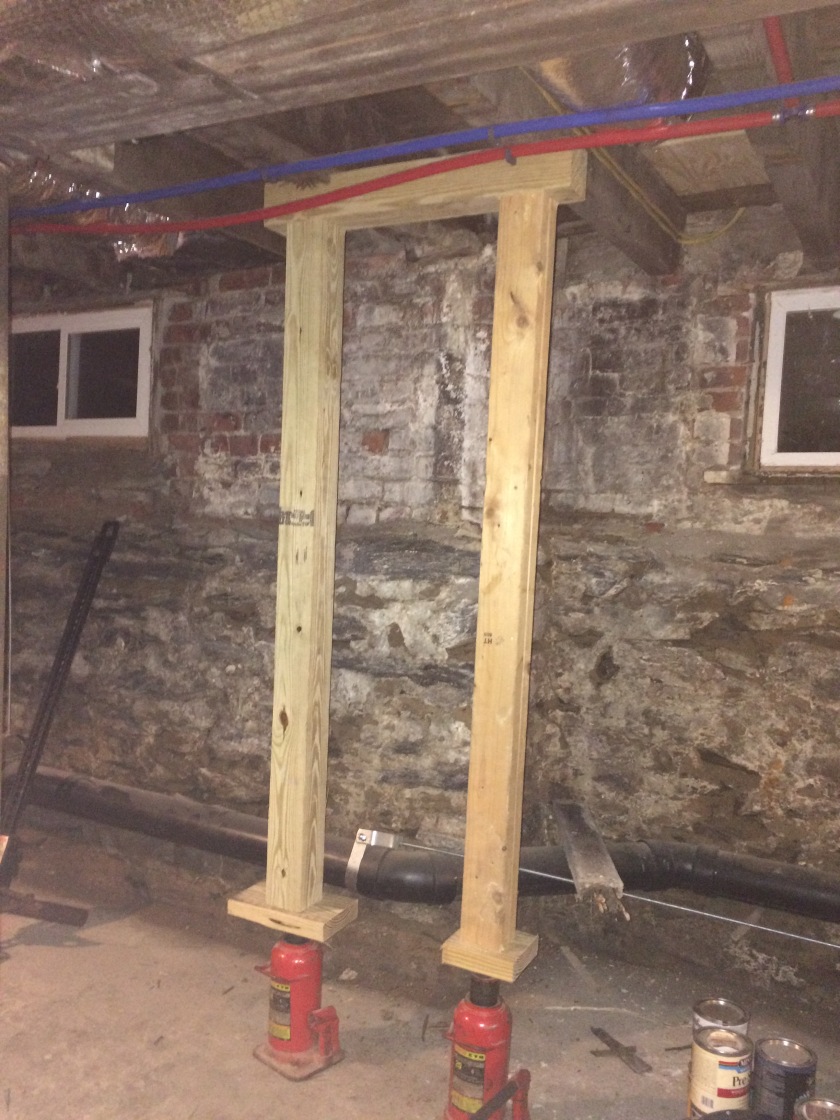
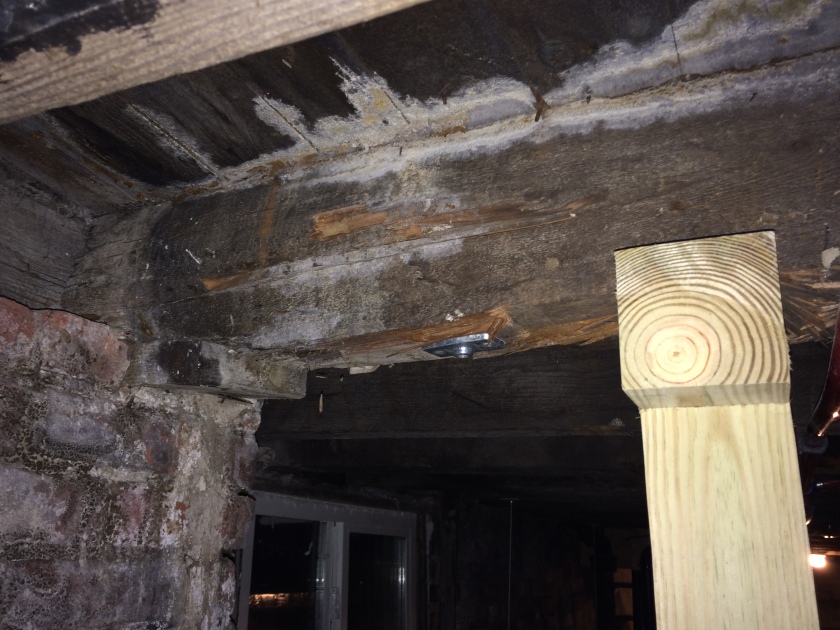
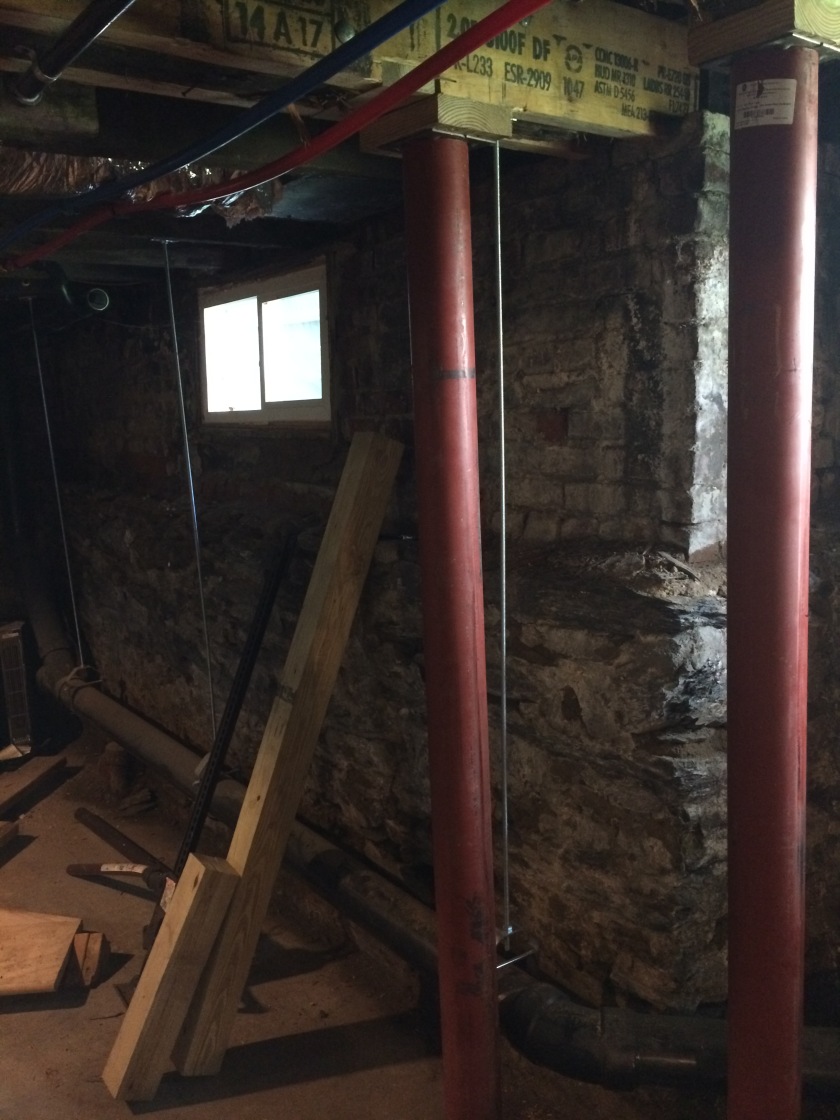
It was a bit reassuring to see that even an expert takes longer than he expects to complete a project at our house. I’m telling you, it’s just a weird time vortex that sucks hours out of your day, and the vortex is located squarely in the middle of our house! It took Jason (with Steve’s help) the better part of the day to measure, install, figure out it wasn’t quite right, then cut and install again, and again.
For their efforts, we were rewarded with a floor that is more level than it was before and a foundation that’s no longer going to continue to sink. And I was rewarded by discovering that a foundation issue wasn’t as bad as I had imagined….as long as the expert is around to help! Now I can safely say that I’ve survived having to have your house jacked up.
Jason also helped fix the back door, since it was now no longer level. They had to screw the door into the walls at different places, which means we now have random holes, which Jason recommends we repair with…..
Wood golf tees! Evidently they are sturdy enough to be a great patch for this kind of thing. “Are you sure you don’t have any?” he kept asking us. Nope, pretty sure we don’t have any golf equipment around here. 😉
Jason also took about 10 minutes to make some adjustments on our front door knob; now it glides open and shut like butter. Ahhhhh, the wonder of having an expert on hand! I wish I had been around when he fixed it so that I could take the opportunity to learn.
Now for the question you’ve all been asking yourselves: with the up and down of the foundation, did we get any new plaster cracks on the newly finished second floor?
Only one, and not as bad as I had feared. I was worried we would lose whole chunks of plaster, but we just have one new crack in the bathroom. See?
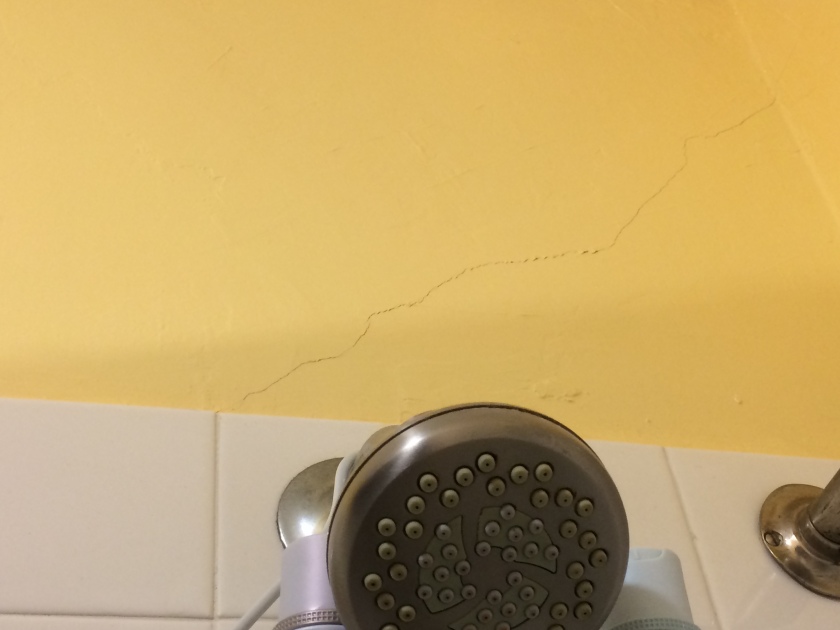
So, next time I break out the plaster, that crack will be on my list to repair.
So, while Steve and Jason were engaged in shoring up the house, I was on the second floor, happy in my zen space. Steve and I are still on our mission to get the second floor fully through Phase 2: Rehabilitate. We’re making progress and are definitely on the home stretch. Most of what remains is now painting, which is something I can do, and something that I really enjoy doing. The only downside is the primer. That smelly, nasty, drippy oil-based primer.
On the docket this weekend was our master bedroom. Last weekend, my brother David and I began work on the room.
My goal was to finish the bedroom and then turn my attention to the closets in each bedroom. My stretch goal was to also paint the second floor hallway.
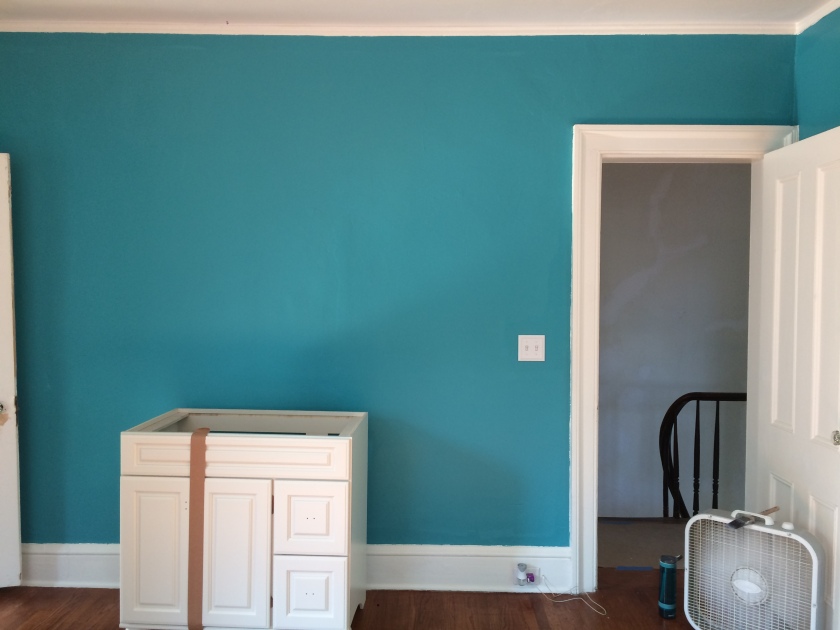
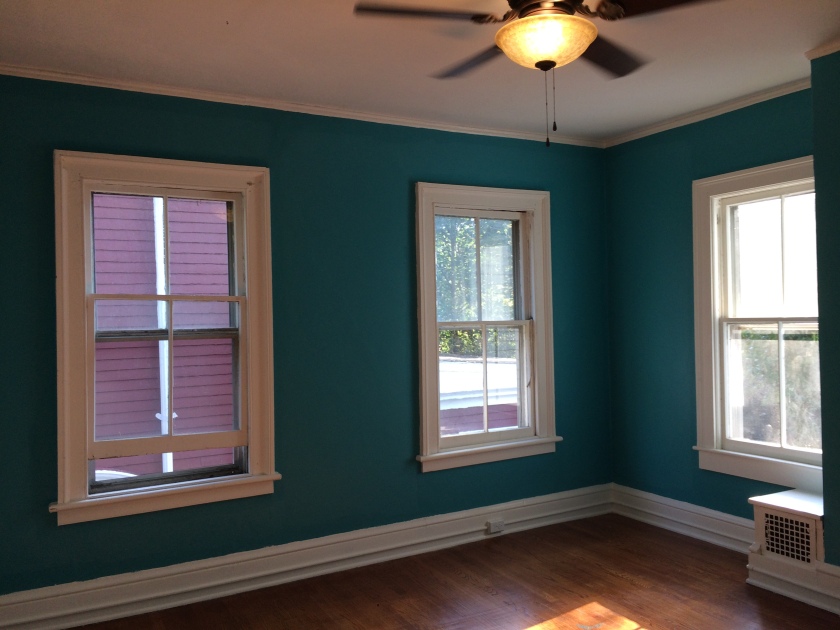
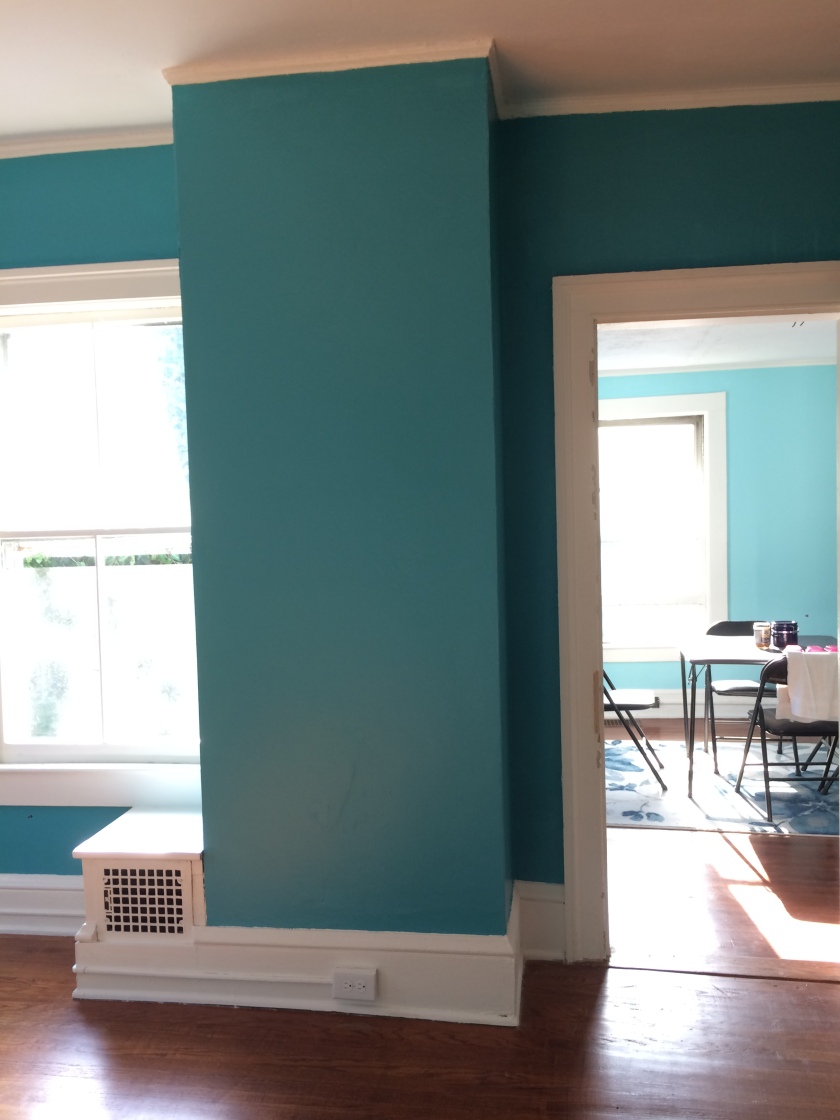
So, up and down the ladder I went, moving across the top perimeter of the walls in the bedroom, cutting in with our signature bedroom color: Aquamarine (teal). Our current apartment bedroom is painted this color and we love it.
As I painted, I fondly remembered the conversations David and I shared: we discussed the intersection of philosophy and education on the topic of inference. Fascinating, no? As the hours passed, I crept along the tops and bottoms of walls and around all the walls and doorways, until the whole room had been outlined in teal. Then, I went back and did it all again. Not because I love painting THAT much, but because when you’re painting a room a dark color, it takes multiple coats of paint.
After lunch, it was time to start coloring inside the lines. Rolling on paint….my favorite thing!!!!!
I rolled through the room with a first coat. Definitely gonna need a second.
Took a break, then moved on to coat #2.
As it dried, I noticed that it still seemed a lot lighter than the places where I had cut in with my brush, so I went back in for a third time. As I moved around the room, I kept my eyes on the first wall: would it dry dark enough to match the level of my cutting in?
Yes! Score! Third coat for the win!
I quickly finished adding the third coat and then cleaned up my painting supplies. But as I sat in the mid-afternoon sun, examining my work, I was frustrated to realize that the paint was NOT drying as dark as it had appeared and you could still see the lines between the rolling job and the cutting in. ARGH!

Time to call in reinforcements. Dad to the rescue!
Dad’s advice was to let it dry overnight and see how things looked in the morning.
Fair enough, since it was almost time for dinner anyway.
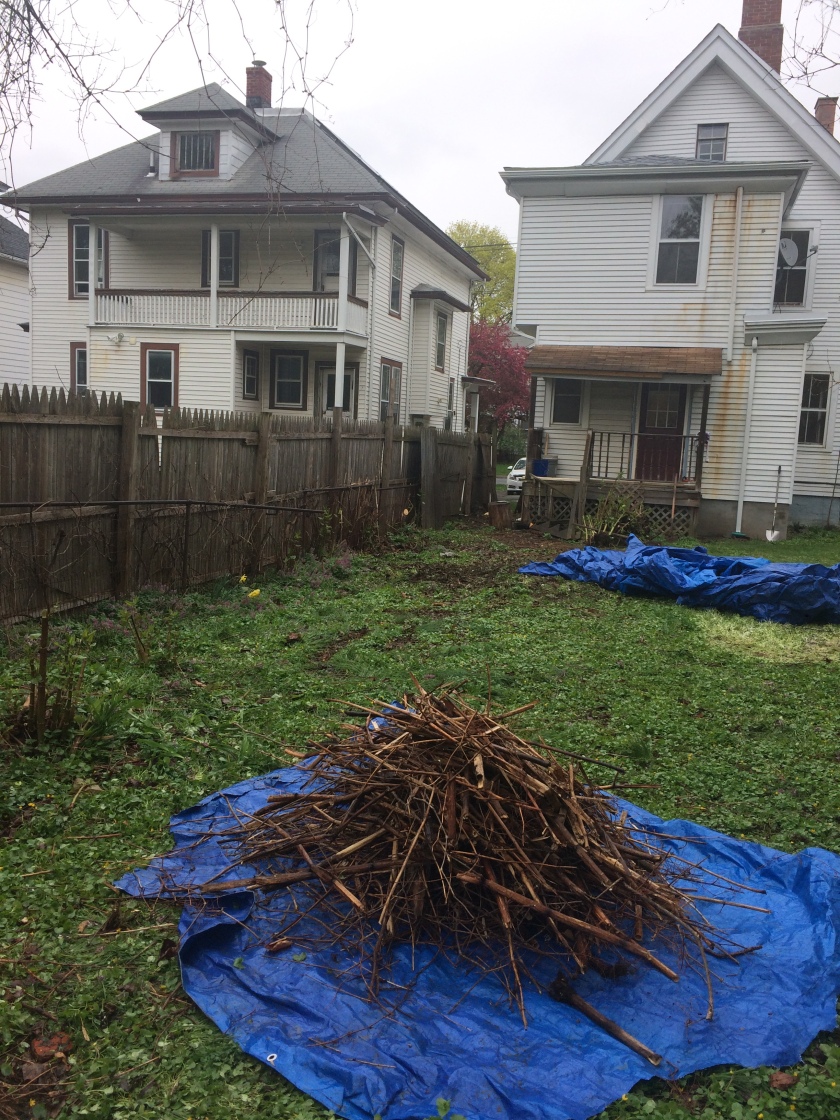
After dinner, I ventured down to the room of gloom, otherwise known as the demo kitchen project. I helped Steve sort and organize his debris. Unfortunately, we had to return our dumpster last week (it was full AND we owed it back), and we didn’t think to get another one for this week, so we ended up making big stacks of plaster, large contractor-grade trash bags, and stacks and stacks of skinny wood lath. Score #2 for the plastic tarp in our backyard: great staging area for demo debris.
The thing you should know about our back porch is that we still haven’t built stairs yet. So it’s basically porch, one half of a stringer (the side that holds the stair treads up), and then, nothin’ but air. To get up and down, you have to basically climb under a railing and then drop yourself to the ground. Fun, huh? So, cleaning out debris and stacking it in the backyard isn’t as easy as it might sound.
By the end of the night, Steve had make a lot of progress on kitchen demo, despite the midday pause for the foundation cause. We definitely felt encouraged that we’d have ALL the walls down by the end of the weekend. And by “we,” I mean Steve will have them down and I will be an appreciative audience.
On Sunday morning we hit the work full force. I quickly went into the master bedroom to see if my some miracle magic, the paint dried even darker than it looked on Saturday. Nope. Still a difference between cutting in and rolling, even though I now had two coats for cutting in and THREE for rolling. Time for coat #4!
Before beginning that project, I knew that if I wanted to make “paint the closets” a task on my list for the day, I would need to have them primed with my stinky primer. So I quickly went through and primed two closets and the hallway. Or, as quickly as one can prime closets and hallways. They are deceptively time-consuming. They seem like they’d be fast since they are small spaces, but their nooks and crannies and miles of trim make it a process.
Once that was done, it was time to turn my attention to finishing up painting the master bedroom. First up….the door. There’s one door in the master bedroom that leads from the bedroom to the office that was really, really janky. It took Steve and I awhile to repair it, but now it was repaired and ready to be sanded and painted. Yesterday I realized that if I want to sand down the wood fill, I should probably do that BEFORE I begin painting the room so that I don’t add a layer of wood fill dust to the wet paint. Smart, huh?
So I began my day sanding, then painting the door. I was juuuuuuusssst about finished with the door….just painting the side bit that rests in the doorframe. I noticed a small edge of paint peeling off where I had just painted the back of the door, so I grabbed it with my fingernails to quickly pull off the small bit of peeling paint.
I bet you can guess what happened. Yup, it peeled off a long strip of paint and then started a chain reaction of peeling. Argh! Now a big section of door that I had just painted was lying on the floor, getting wet paint all over the wood floors.
I quickly cleaned up that mess and left that door to dry. It will now need more wood fill (in a new spot) and then more paint. Sigh.
The final door in the room was the back of the closet door. I’d previously painted the front of the door but since I wasn’t ready to tackle the closet yet, I saved the back of the door for later. Later was now, Sunday.
Having learned my lesson from the previous door, I began by checking to make sure all the peeling paint was peeled. Nope, I had quite a bit of peeling left to do. By the time I was finished, the back of the door was missing about 80% of its paint, all the way down to bare wood, which meant….it was high time to prime time. So I primed the door, then went through the room doing touch ups to the trim since I had the trim paint out anyway.
By this time, the majority of my day had elapsed and I still hadn’t started the master bedroom. Rather than starting that project, I decided to begin by painting the master bedroom closet. I wanted to do that project while I had the most possible light available.
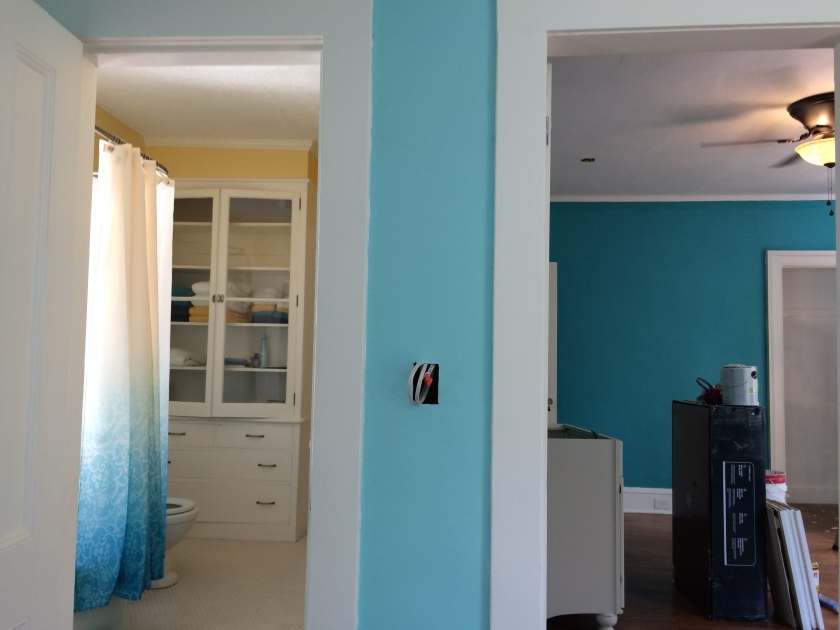
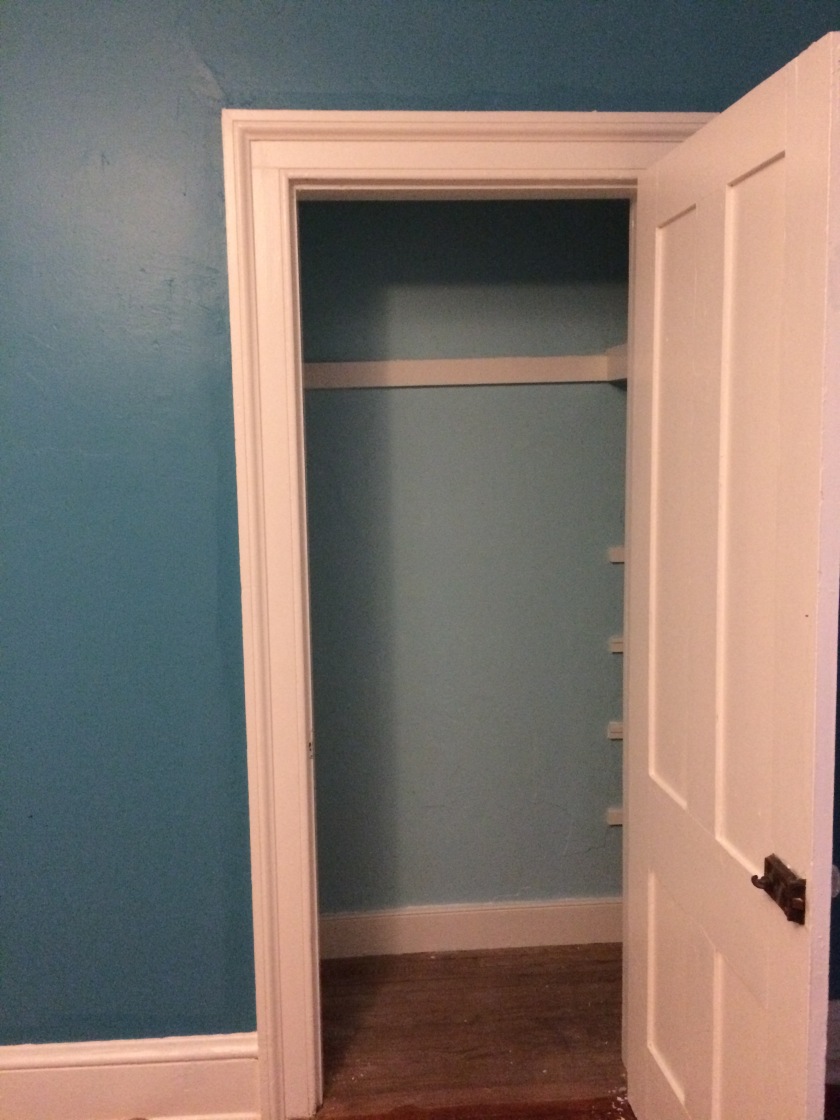
I’m not sure if we’ve discussed this yet or not, but who says that closets must be white? Why are closets always white? That seems so dull and boring. You know how shoes always used to be brown or black on the bottom, then some famous designer had the idea to have a lady’s heel be red on the bottom? A pop of color! How interesting! Same thing! You open the door of the closet….a pop of color!
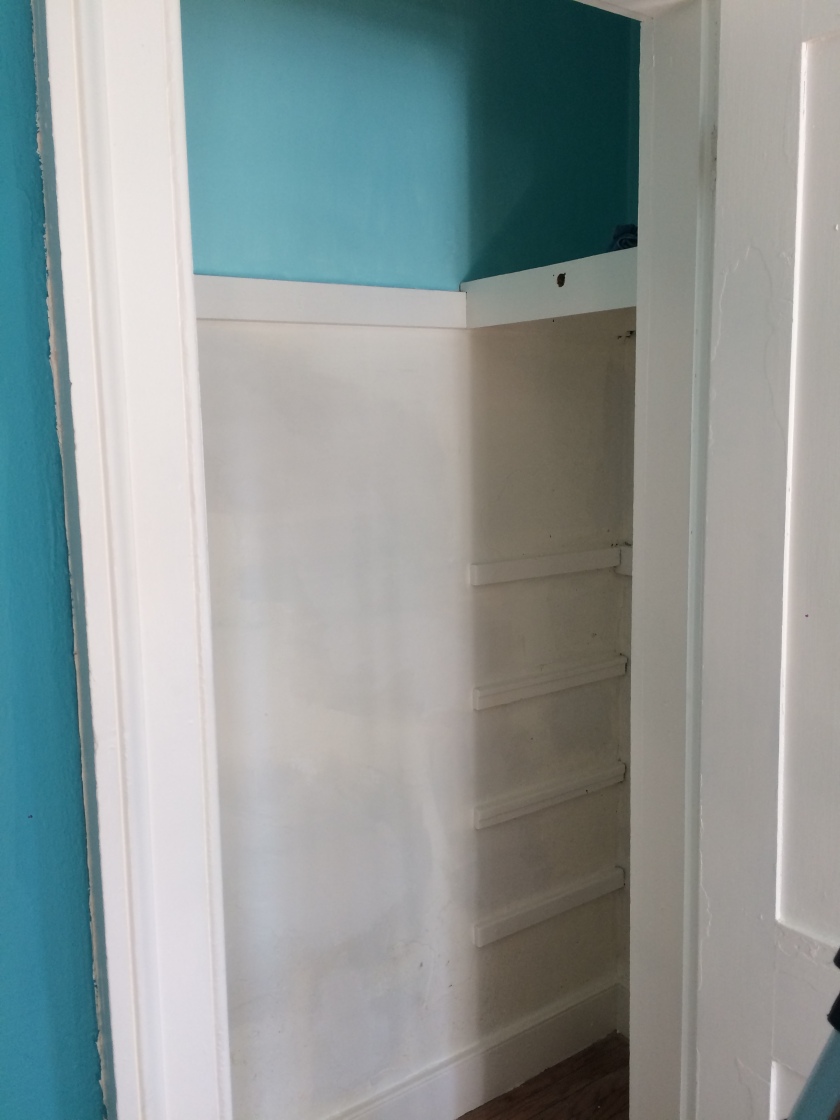
We decided on the bathroom yellow in the office closet and the office blue in the master bedroom closet. Here’s how it looked when I stopped for lunch
After lunch I continued applying coats of paint to the trim and to the closet walls. By the end of the day, the trim was done and the closet was done.
The master bedroom? Not so much. I mean, it’s painted and it looks nice, until you know enough to look for the paint color change at the top and bottoms of most of the walls. Then you can’t stop seeing it. So that project will need to wait for next weekend.
All in all, here’s what’s left for Phase 2 on the second floor (anyone who knows me knows I love me a great list):
- Finish painting master bedroom walls
- Finish painting master bedroom/office door
- Paint guest bedroom closet
- Prime and paint gray closet ceiling
- Prime and paint office ceiling
- Paint hallway (don’t ask what’s behind the attic door. I’m saving that for later)
- Install light fixtures in the gray closet, in the office, and in the hallway
- Repair the plaster crack in the bathroom
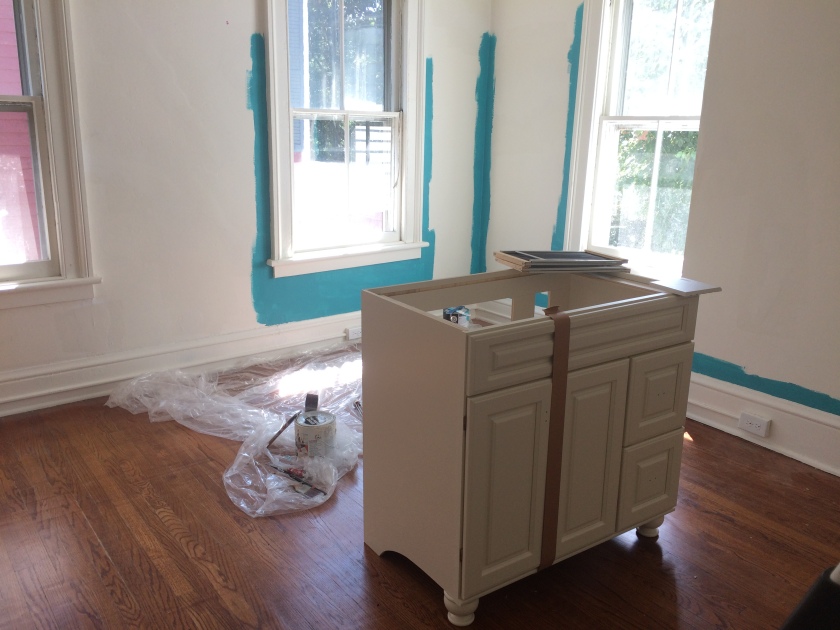
- Install new bathroom vanity
- Touch up paint in bathroom where plaster cracked
That’s it! Ten steps and then we can get the floors refinished, then we are officially move-in ready on the second floor. Not that we’re DONE with the second floor, but that it’s in a place where furniture could be moved in.
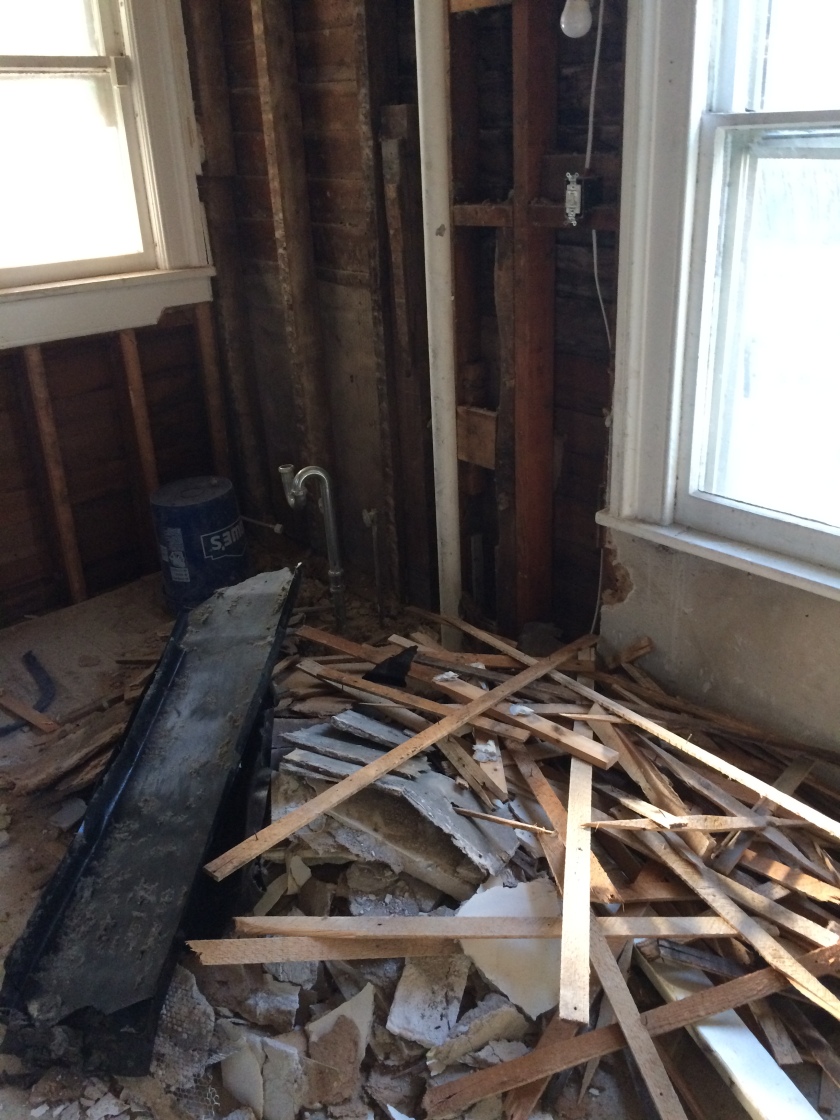
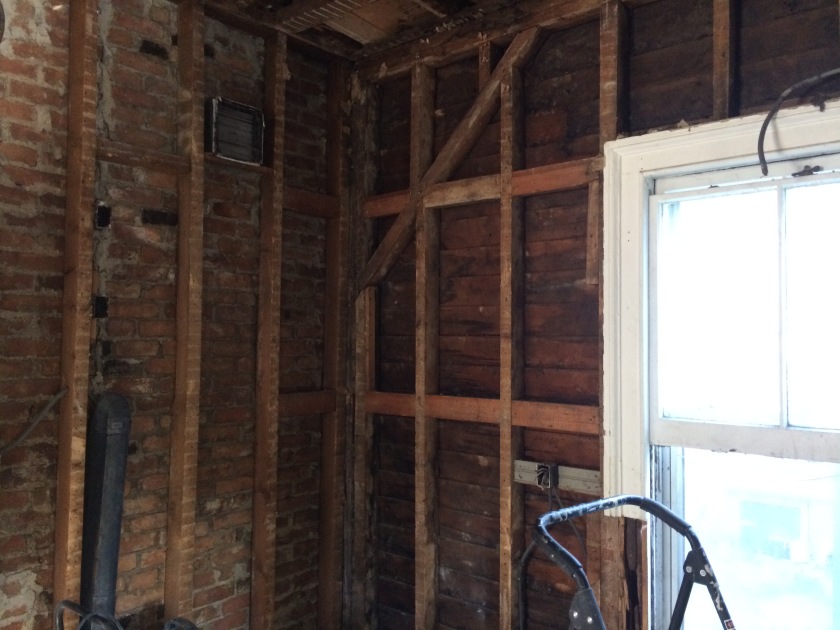
Speaking of moving projects along, how could I possibly end this blog without telling you about Steve’s progress? By the end of the weekend, Steve had achieved his goal of knocking down ALL the necessary walls in the kitchen and the laundry room/bath.
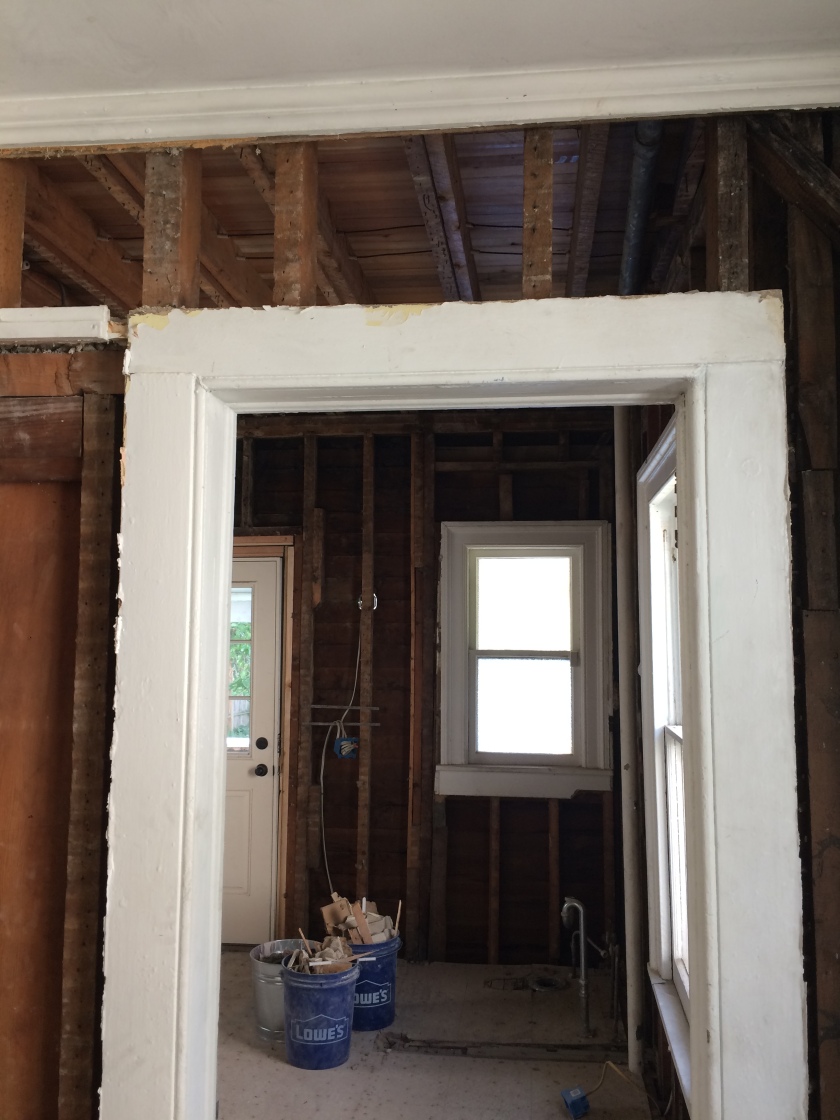
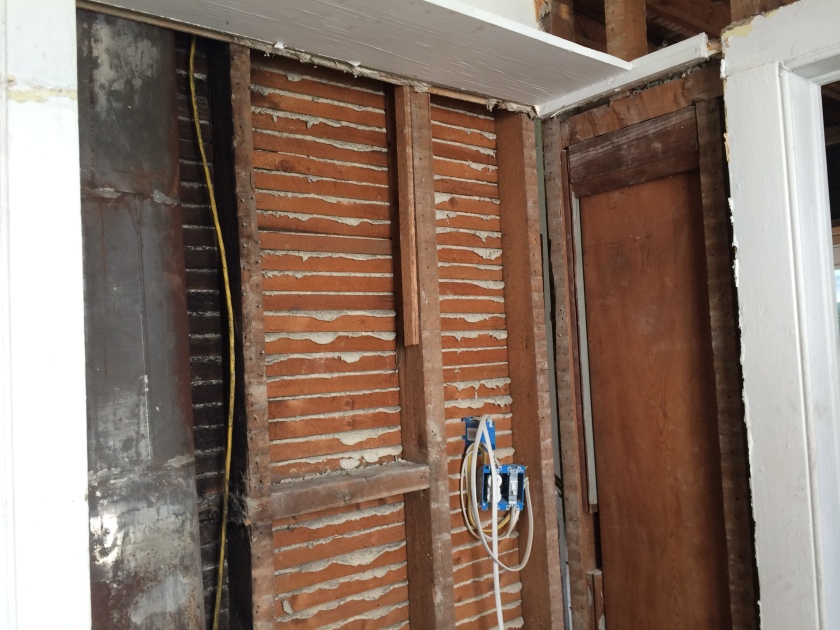
We made an interesting discovery in the laundry room: the heating vent system (pictured on the left above) was not realllllly attached to itself. There are big sections of hollow cylinders that are supposed to be connected to each other to make one long tube from the heater to the registers where heat comes out. Some of the cylinders are no longer lined up properly, meaning that instead of heating rooms, the system is…..heating the spaces in the walls. We can fix this section with some good ol’ fashioned duct tape (finally using it for its intended purpose). However, one has to wonder: if this duct looks like that, what about all the rest of the ducts?
He also cleaned up the debris and got everything ready for the electrician and the plumber. All that’s left in demo world is ripping up the floors, which hopefully is a bit faster/easier. We shall see.
Steve also crossed another major milestone this week: we are fully approved for solar energy, so bright and early on sunny Saturday, Steve flipped the switch and converted us from traditional energy to sun powah. Yay, Solar City!


Really a lot of progress this weekend. Kitchen gutted, utility room gutted, foundation lifted and secured, master bedroom full steam ahead, and solar power turned on! That’s a LOT of work for one weekend. Kudos to both of you. It’s rounding the bend!
LikeLike
Looking good! Solar power HOLLAAAAA! That’s so cool! So many projects finished in one weekend. Awesome job!
LikeLike