After multiple weekends working on kitchen demo, Steve and I were eager to see this past weekend be the LAST weekend on this part of our kitchen project.
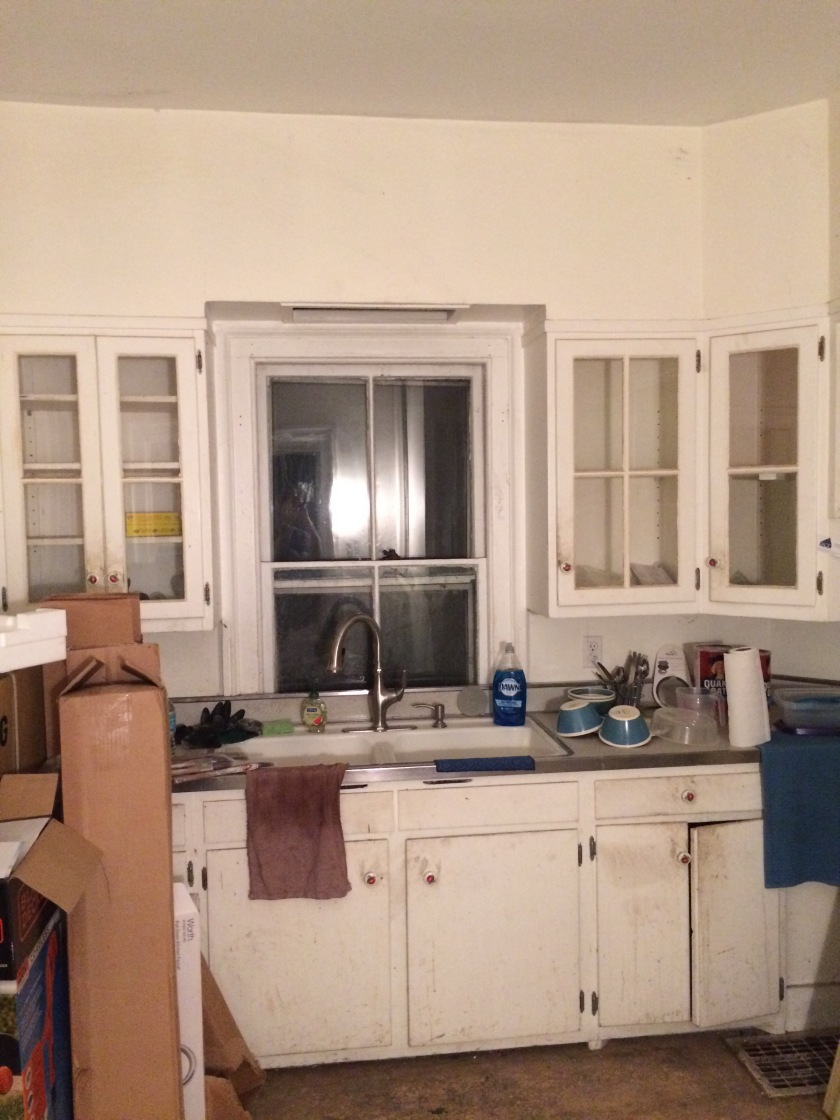
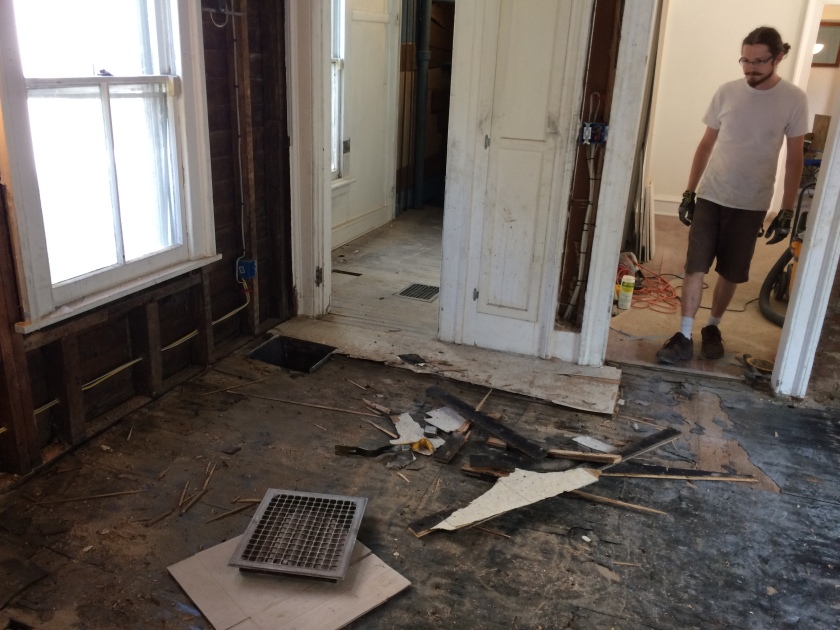
So far, we removed the cabinets, the walls, and the ceilings in both the laundry room and the kitchen. This weekend, our final project was to remove the floor, all the way down to the subfloor. I’d handle about 0.5% of that project and Steve would pick up the other 99.5%. Seems fair, right?
I’m still riding high on a 4-week gift of half-day Fridays from my new employer, so this Friday I decided to head upstate early, as soon as I finished work, since the spindle place called and our replacement spindles were ready. They are only open until 4:30, so waiting for Steve would mean I wouldn’t get in before they closed.
As I drove up and out of NYC, I made a very important discovery: all this time our new Prius has had satellite radio and we never made use of it.

I think that’s mostly because:
(a) Steve is always driving and he’s the one who likes to “push all the buttons” in any new room, on any new gadget, or in any new car
(b) we spend most of the time in our car together and we are usually talking a mile a minute, planning our next project on the house or debriefing the project we just finished.
I arrived at the spindle store and picked up our new spindles.

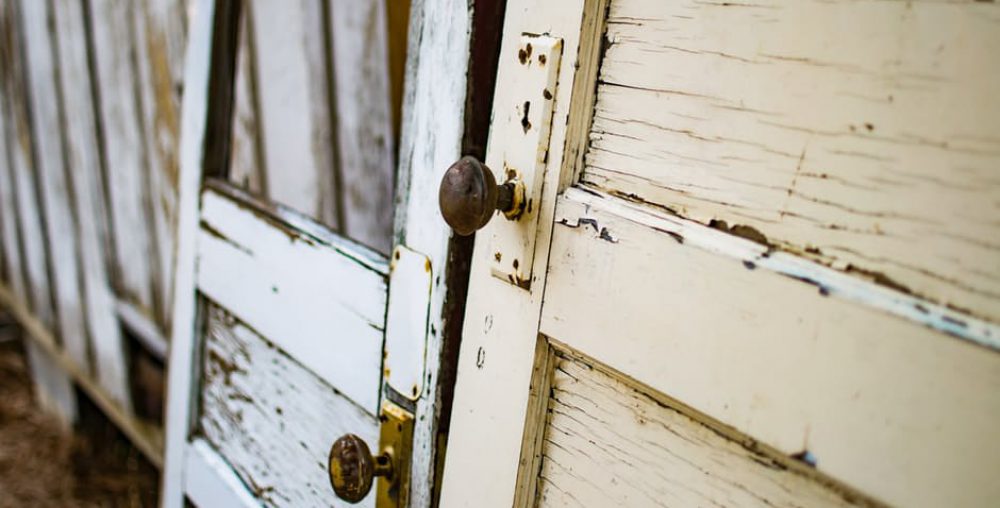
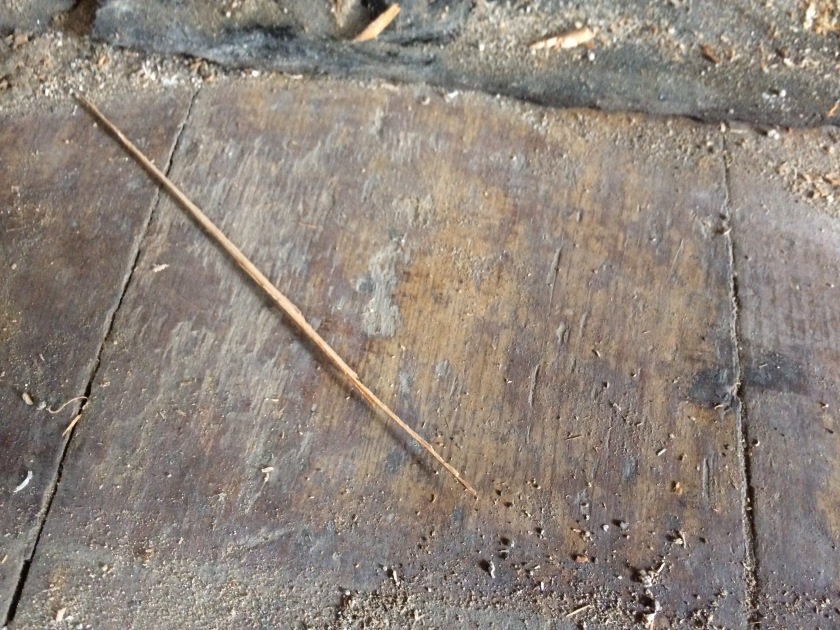
Upon getting to the house and examining them more closely, I discovered that they are juuussssttt a bit longer than our current spindles. They are actually enough longer that they don’t fit in their holes. Also, the bottom of our original spindles are dove-tailed, which means they have a trapezoid-shaped rectangle at the bottom, designed to fit in a hole perfectly without needing nails. These new spindles were built with a circular bottom (you can see this in the picture above). So much for “replication.”
We’ve decided we can shave off 1/4 inch of the new spindle ourselves and we can use wood fill to make them fit into the original holes.
Still undetermined: how to get the new spindles to match the color of the original spindles and how to fix the actual stair treads, which are in rough condition. One route would be for us to replace the treads ourselves. Another route would be to have our flooring guy help. We haven’t selected a route yet. Which do you think we should try?
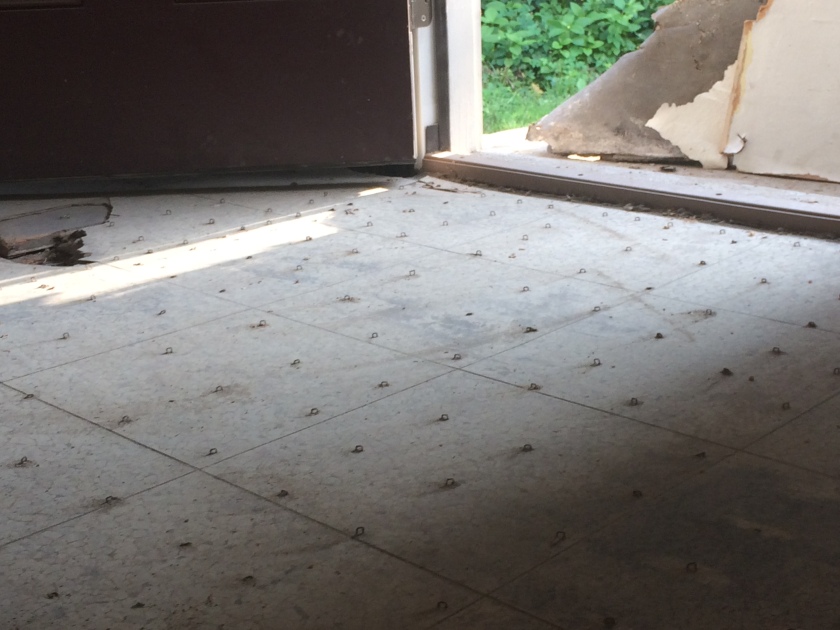
After changing into work clothes, I headed to the kitchen for my 0.5% of the demo project. My task was to hammer in staples. See, when the previous homeowners laid down very bizarre looking plywood and weird thick vinyl, they attached it with about one million and one staples. Since we are cutting out the floor, the floor needs to be level without nails or staples sticking up. That way Steve can drive his circular saw over the top layers of the floor without getting it stuck on the staples.
HAMMER TIME!
I used our mash hammer to push the staples back into the floor. It was a lot like playing whack-a-mole at the arcade, which was always one of my favorite games. I challenged myself to see how many staples I could mash in with only one good hit.
Result? About 50% success rate. Not too bad for someone who is very uncoordinated.
Just as I was finishing up that project and preparing to go retrieve Steve from the train station, my brother David pulled up. Yes, that’s right. We got a whole extra weekend with an extra set of hands. I was over the moon about getting his support. Heaven knows we need all the help we can get if we are going to meet our deadline of moving in by the end of the year. And he’s always such a gracious helper, never complaining even when he is lugging pounds of plaster through the pouring rain.
Saturday morning dawned bright and early, especially for those people related to “happy house building day” April, who likes to wake up at 6:00 to work on the house. Yup, still doing that.
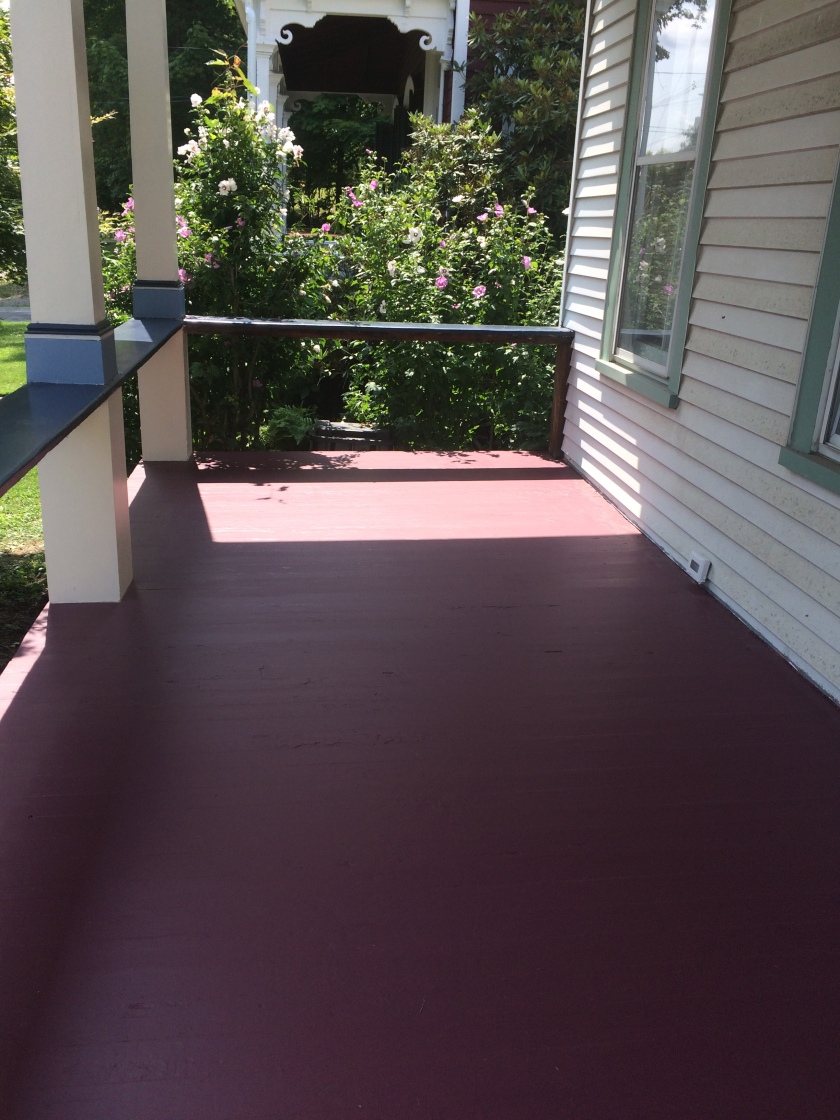
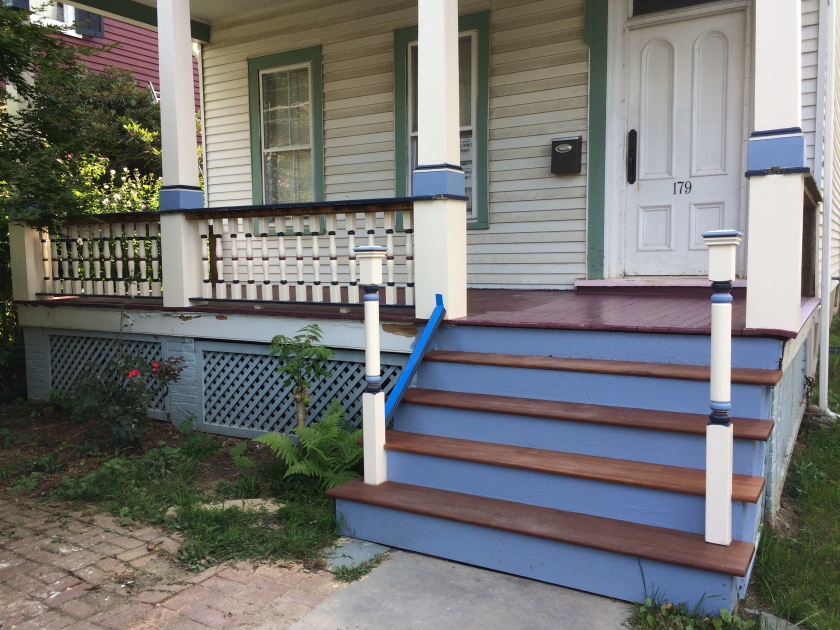
Since I was the first one up, I decided to tackle a mini-project on the front porch. A while ago we had put down a layer of paint on the floor, but I wasn’t too happy with it. I’d been on the hunt for a while for something that we could put on top of the paint to prevent the paint from getting scratched up from walking on it. No one was saying it was okay to put polyurethane on top of the paint, which is what you normally use when you stain the porch. So, on a random field trip to Lowe’s a few weeks ago, I just meandered up and down the aisles, looking for a solution, when I found porch paint specially designed for porch floors that has polyurethane built right in! Yeah, baby!
So Saturday morning while the guys were still sleeping, I was getting my zen on by rolling out a layer of fresh paint.
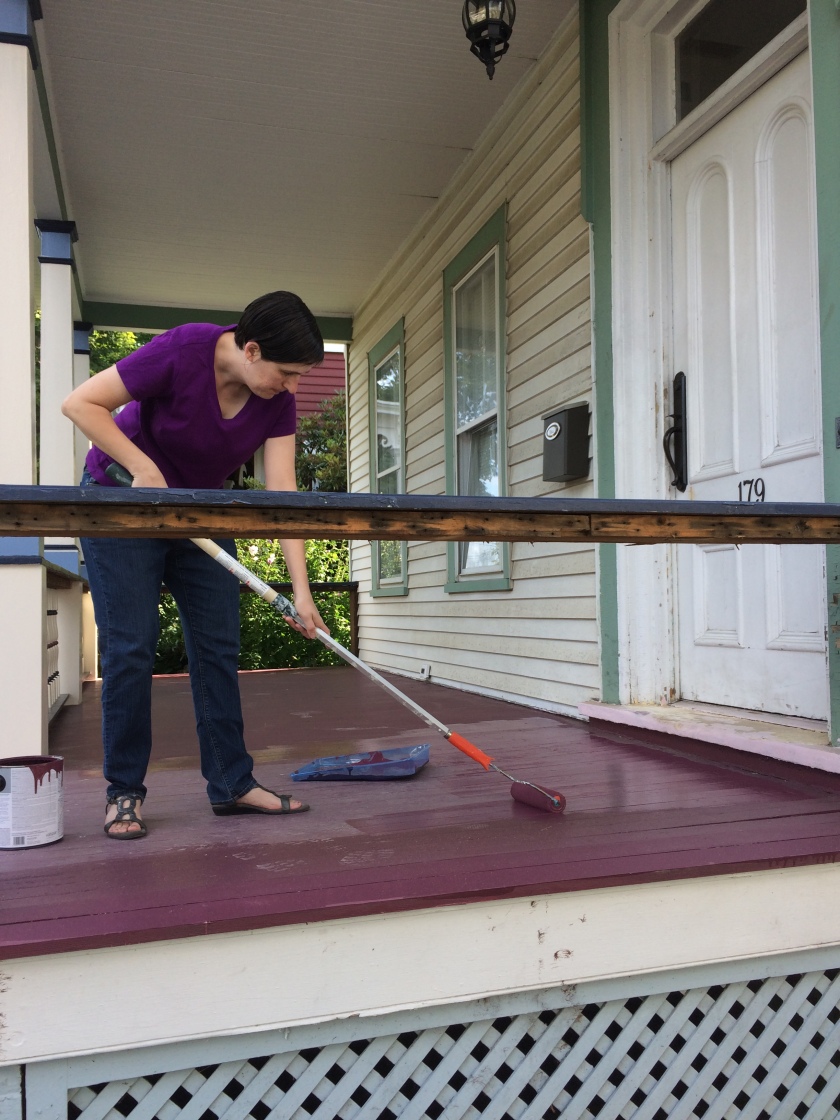
Ahhhhh, so beautiful!
After the guys awoke and came back from their coffee run, we all started in on our day’s projects. David and Steve were set to tackle ripping out the floor while I sequestered myself upstairs, painting away. Steve’s project was to rip the floors out, while David served as garbageman, hauling debris to this week’s dumpster, and also pulling out the thousands of nails from the wall studs so that we can eventually put up new drywall.
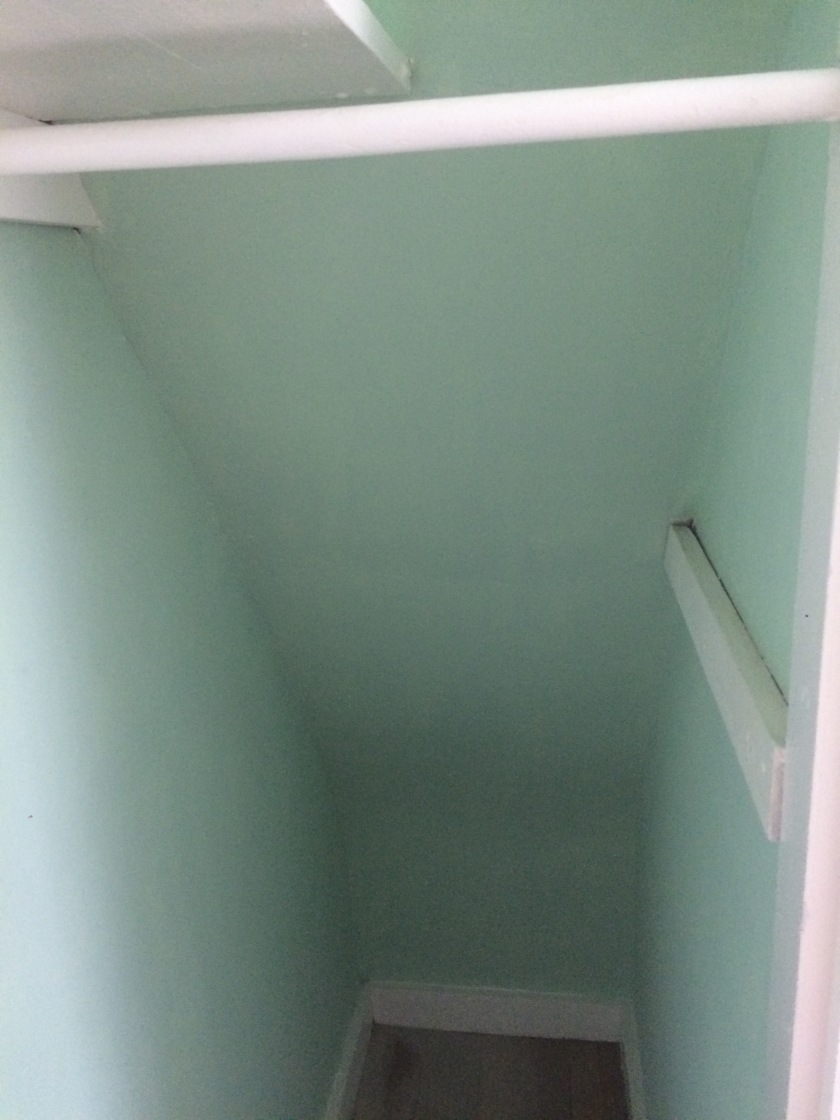
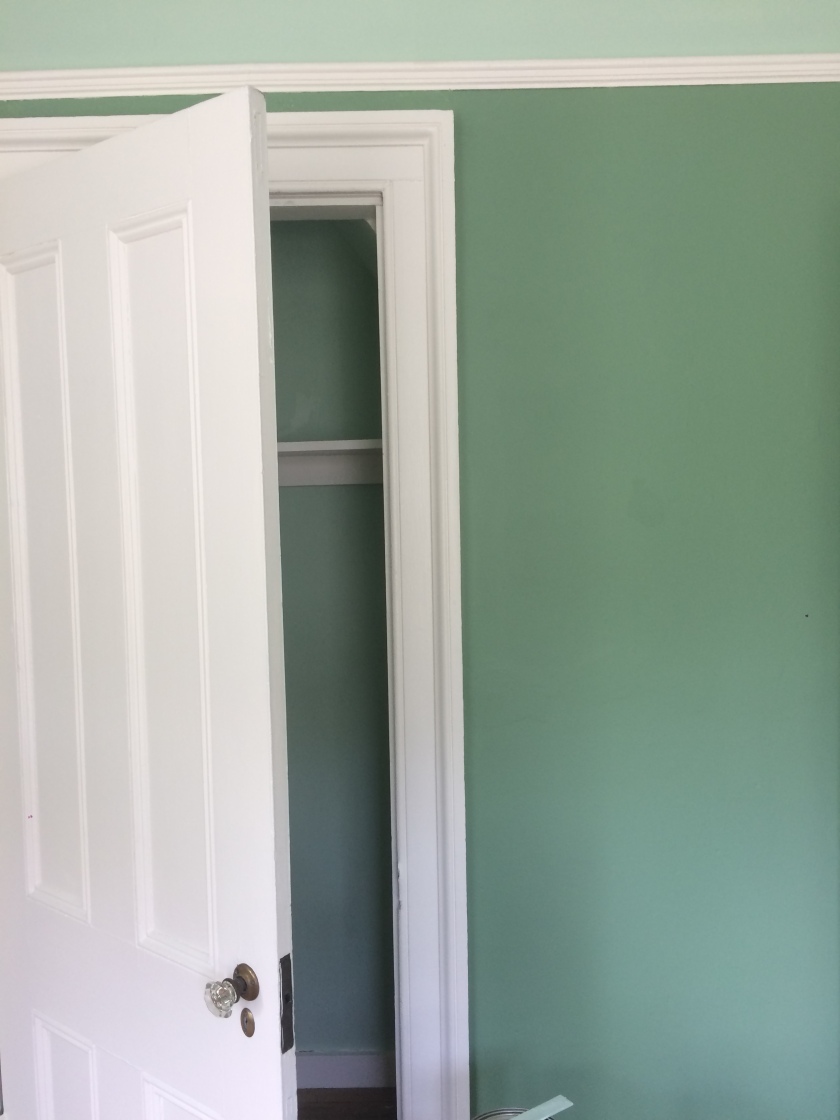
I started with the guest bedroom closet, which I decided to paint to match the light green above the picture rail. I’m pleased with the results of that small project. Plus, it gets us one step closer to being done with Phase 2 on the 2nd floor.
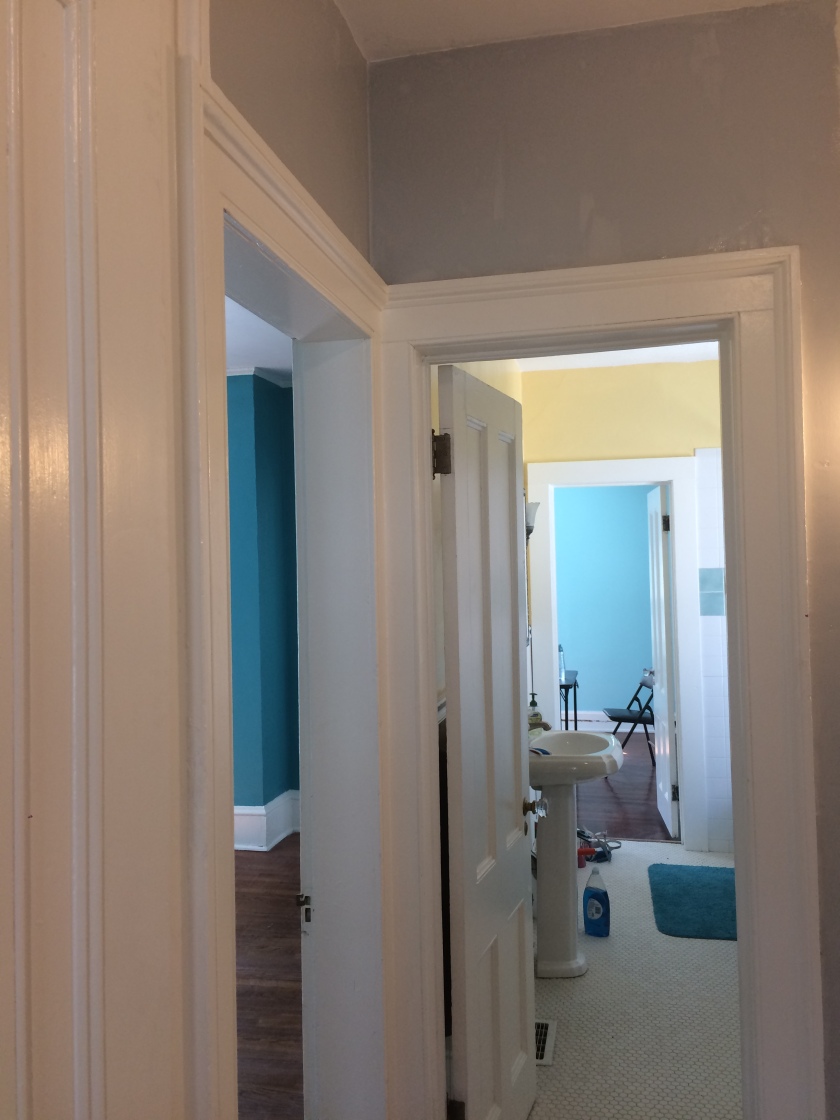
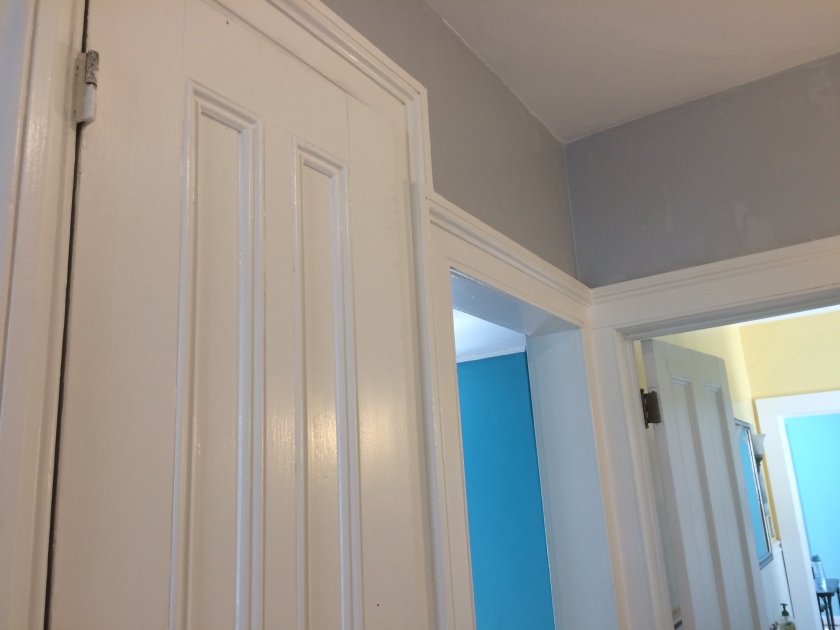
To inch us even closer, I also worked on painting the hallway in the second floor. We’ve been itching to try out more gray paint, since we liked the color so much in the closet. You don’t think it looks like a jail now, do you?
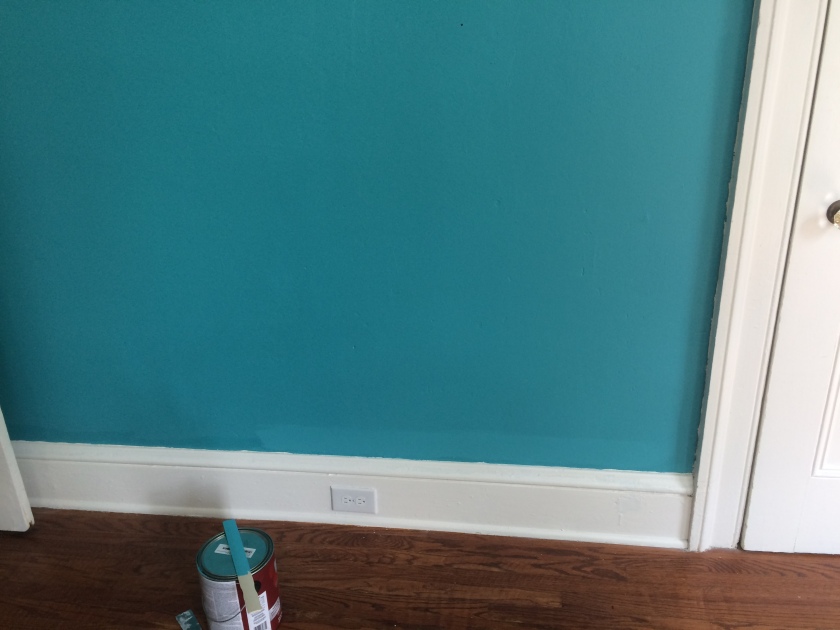
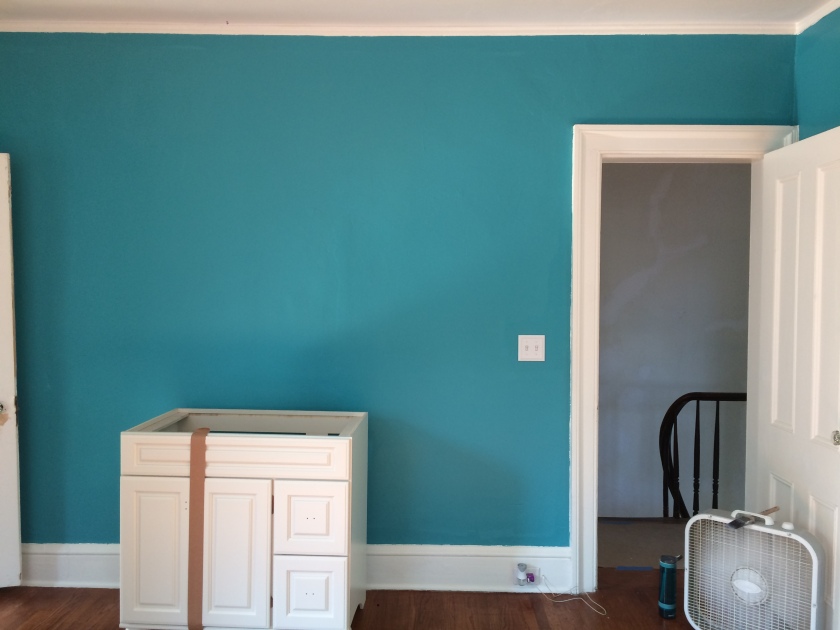
After the hallway, I moved onto the monster that is our master bedroom. From last weekend, you might remember that I painted the walls THREE times but the rolling and the cutting in still didn’t match.
Since the rolling area looked lighter than the cutting in, I decided that perhaps another coat of rolling in was needed to fix the situation. There are times where I have a lighter hand on rolling than on cutting in, so perhaps that was the problem. With about 3/4 a gallon of paint left, I should have just enough to finish another coat all the way around the room.
After painting, leaving the room for lunch, then returning, I discovered that my hypothesis was incorrect. Another coat of paint didn’t solve the problem. The discrepancy was still just as large.
So, my new hypothesis: I had two gallons of paint for this room. It must have been that when I moved to the second gallon, it was just enough different in its shade to be noticeable. Thanks a lot, Sherwin Williams!
Now I didn’t have enough paint left to cut in all the way around the room and make it even. If I had known THIS was the problem, I could have cut in earlier rather than rolling. Instead, it was back to the store for another gallon of aquamarine paint.
I decided to stick with Sherwin Williams, since that was what I was already using in the room (I’ve learned that Valspar is much higher quality). I figured the new gallon would either be the darker color of the cutting in and then I could just re-roll. Or else it would be the lighter color from where I rolled and then I could just cut in again.
So, I painted a small section of a cutting in area and waited for it to dry.
Horror of horrors.
It was neither the lighter color NOR the darker color. It was a third shade all its own. Say WHAAA!?!?!?!?!
Now I would need to repaint the WHOLE room!
Fortunately, before I had to go to my quiet corner to calm down, David came upstairs to offer his help. Together, we repainted the room. It’s now our special room, since that’s where we spent a good few hours last time painting and discussing philosophy. This week we talked music, jobs, travel, and random bits of nothing that siblings find to discuss with one another.
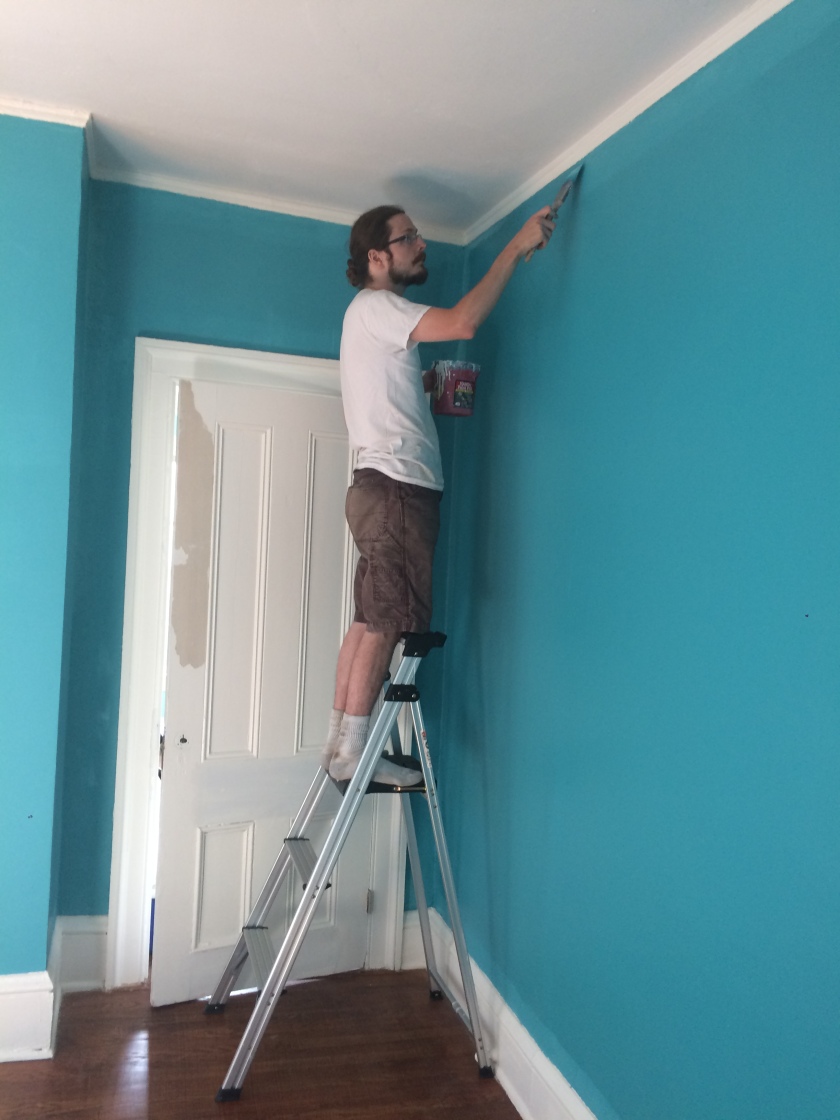
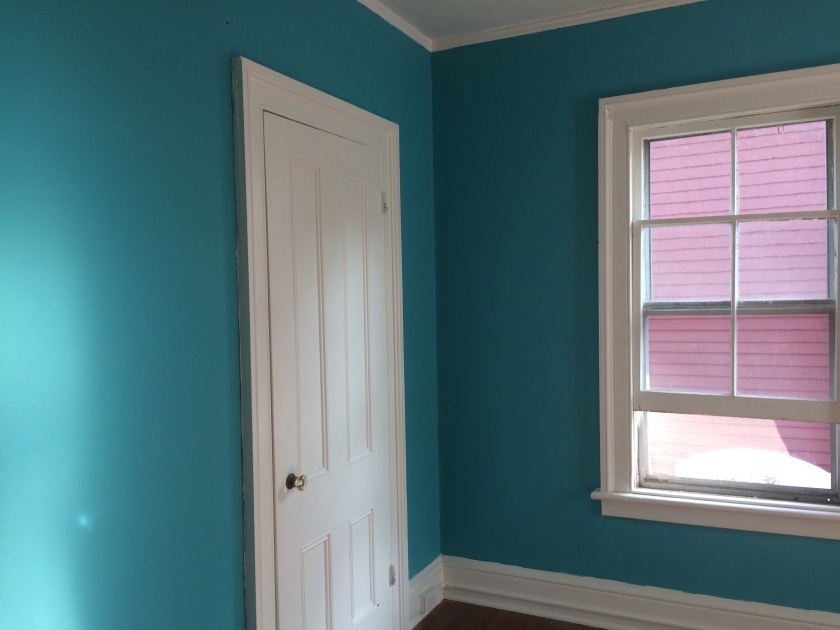
The time flew by and soon we had a repainted room. And finally, this time, it worked. The entire room is one color with no weird bits. It only took six coats of paint. Well, at least if we scuff up the wall, it will be quite a while before we hit white paint.
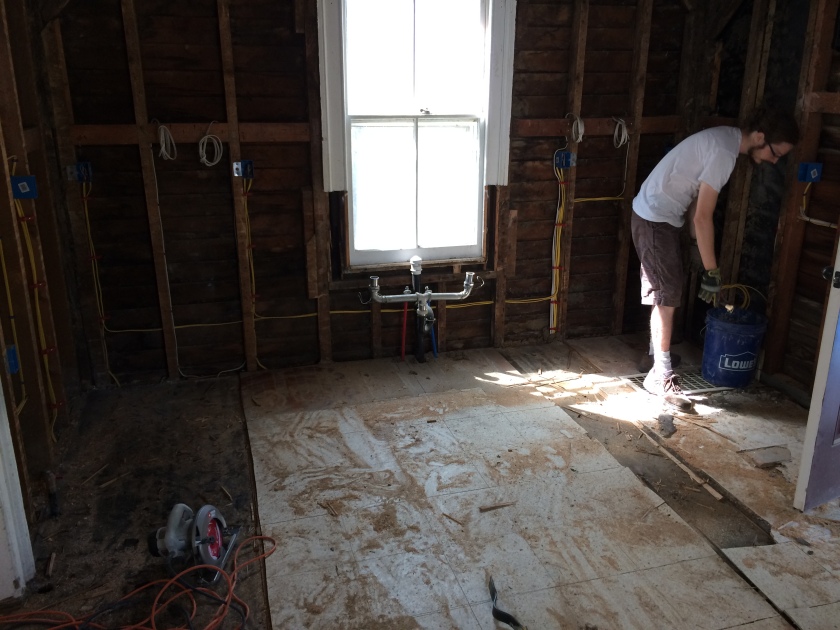
Meanwhile, Steve was busy downstairs ripping up floors. He had to work carefully to cut just deep enough to remove the top layers of the flooring without cutting into the subfloor. If he cut the subfloor, then we’d have nothing to stand on! He did a precise, methodical job and was finished ripping out all the floors by the end of the day.
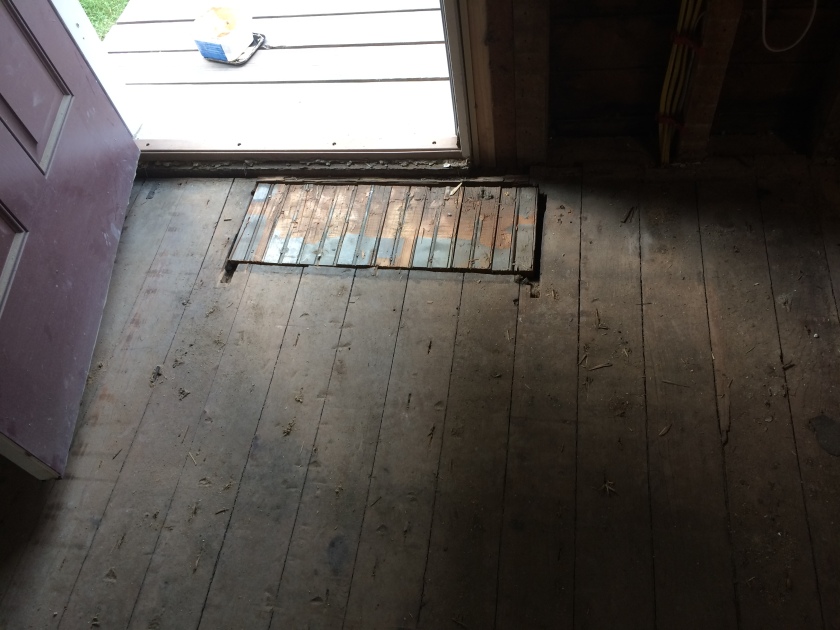
He did reveal some problems in the subfloor that were not apparent when looking at the subfloor from the basement. There had always been a section of the floor connecting the kitchen to the laundry room where you had to step down. We figured it was from the foundation issue. Nope. It was from a significant amount of water damage that the previous homeowners tried to cover up with SHIMS! That’s right, boys and girls. They used thin bits of throwaway wood as flooring and hoped we wouldn’t notice.
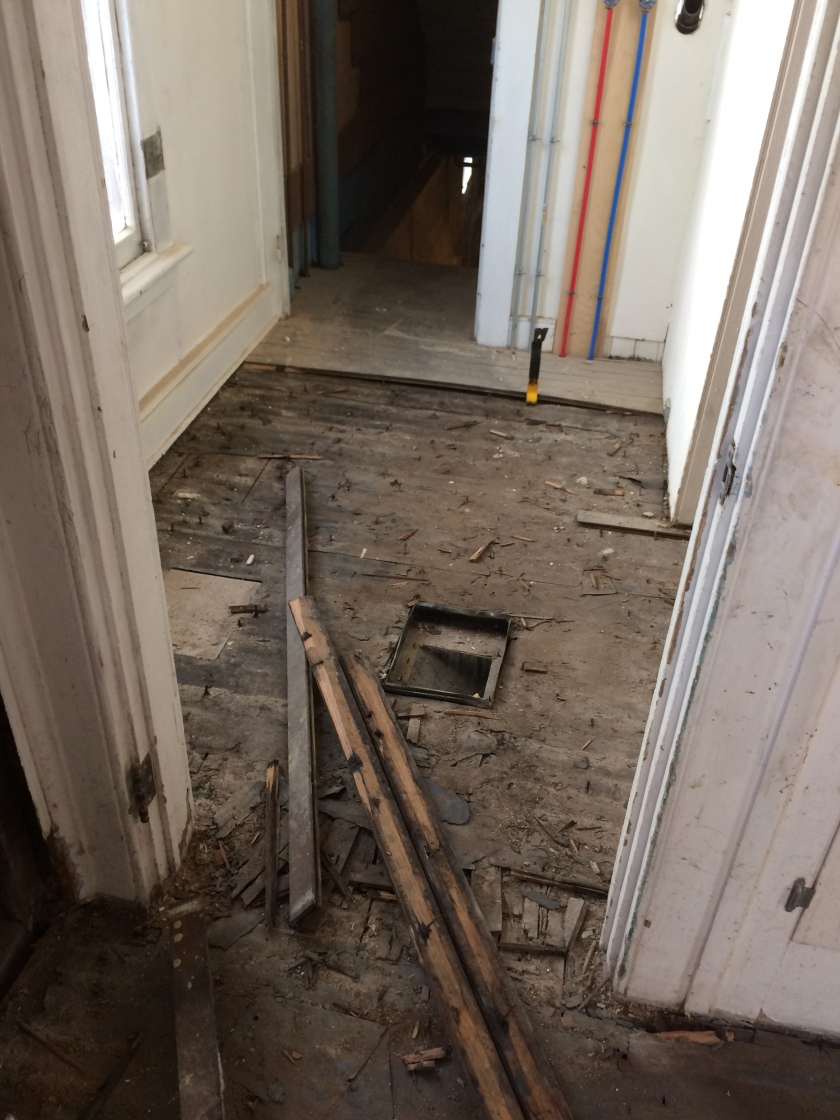
Other sections also showed signs of water damage and were mostly patched with beadboard.
Beadboard must have been on sale at the hardware store when the family was repairing the house; we’ve found it everywhere, including this weekend’s find: propping up another failing support beam. Cool. Not.
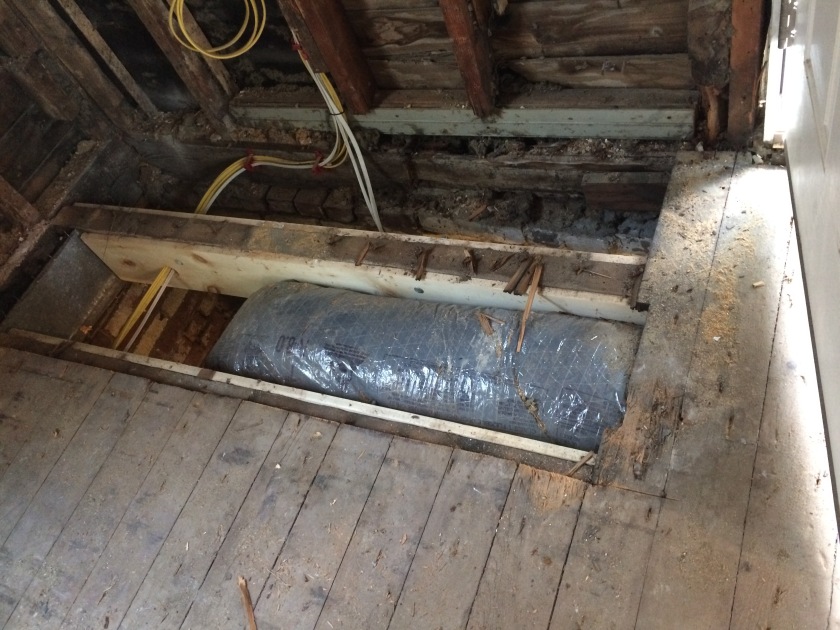
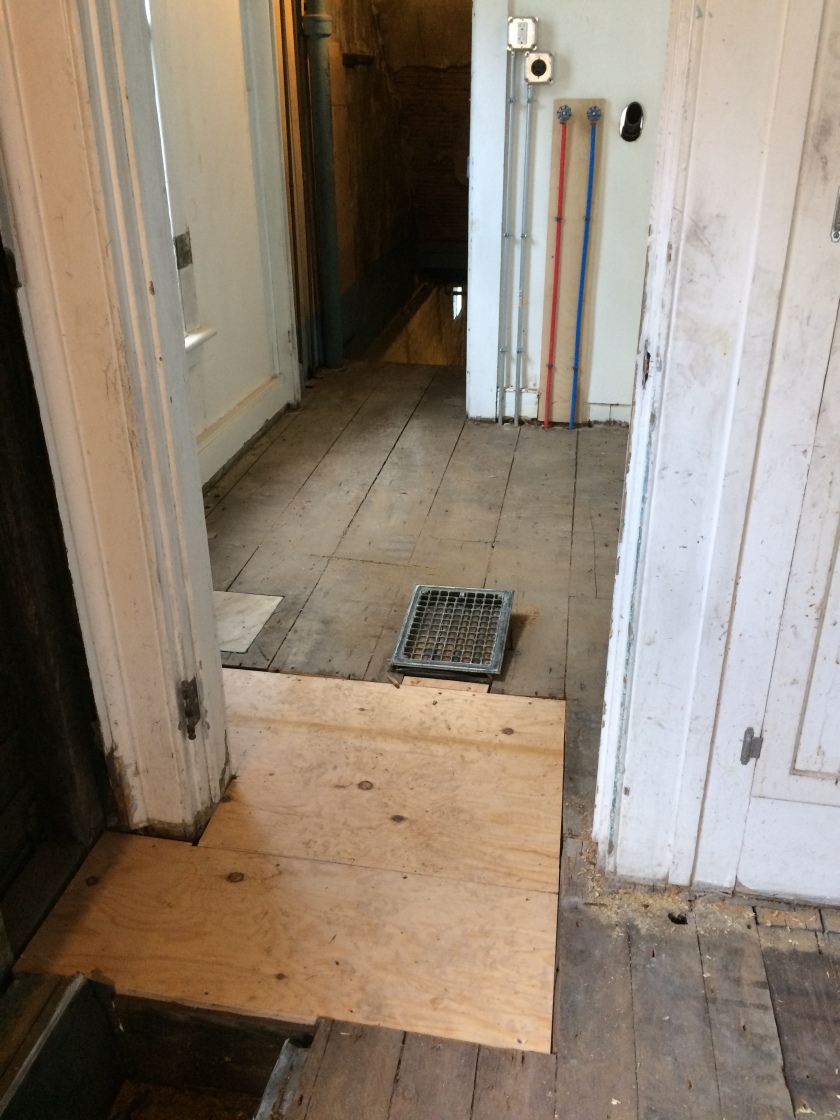
Fortunately, we have a secret weapon. Its name is Jason. He came over on Sunday and after assessing the situation quickly started making repairs with large pieces of plywood. Feels much safer to walk around our floor now!
On Saturday night, David led us to a new restaurant we hadn’t tried yet in town. David is vegan, so it’s always a bit of an adventure finding a place where he can eat. This weekend was a true winner. We found an Argentinian fusion place and it was perfect–low-key, relaxed, with a great variety of delicious food, including some delightful cupcakes.


On our way back to our house we drove through our neighborhood and peeked at some of the other cute houses. This one was one of our favorites.

Back at the house, the guys decided they had time to tackle one more project before calling it quits. We have had a bathroom vanity sitting in our master bedroom for a couple weeks now, and we decided it was time to give it a more permanent forever home in the house.
So David and Steve tackled the installation, which required removing the old sink and figuring out how to reattach all the plumbing to the new sink and vanity.
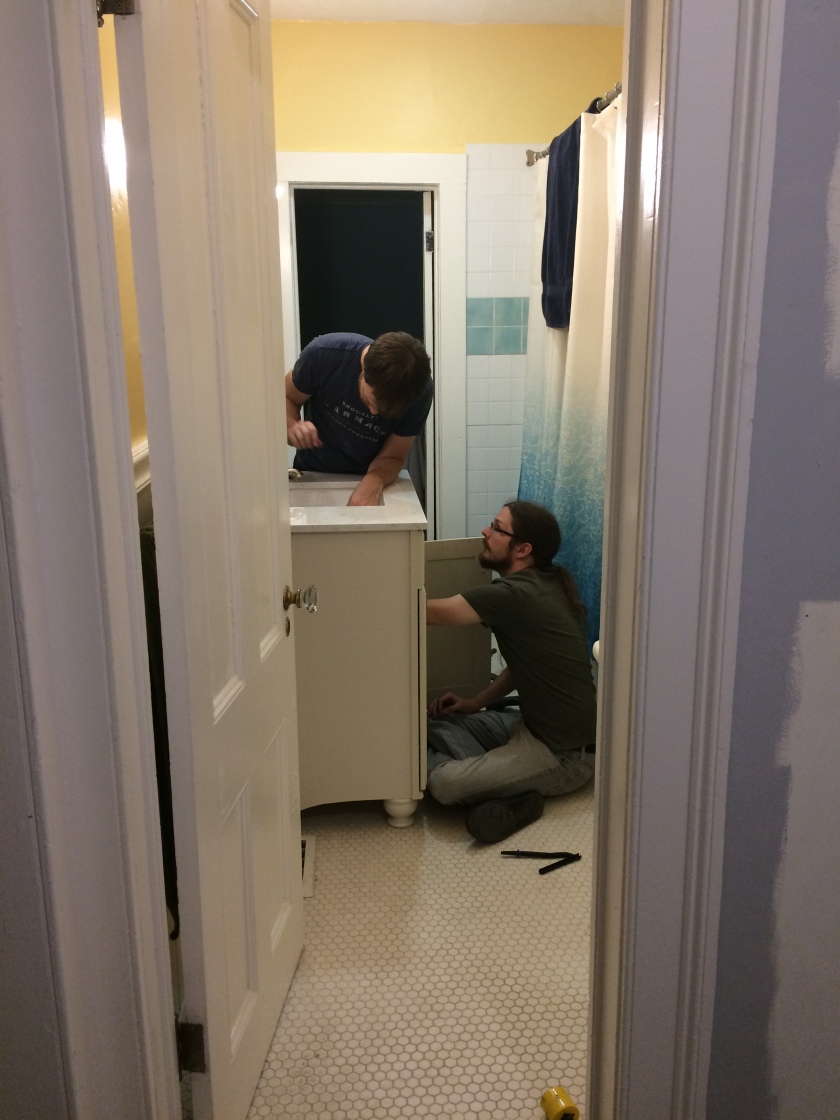
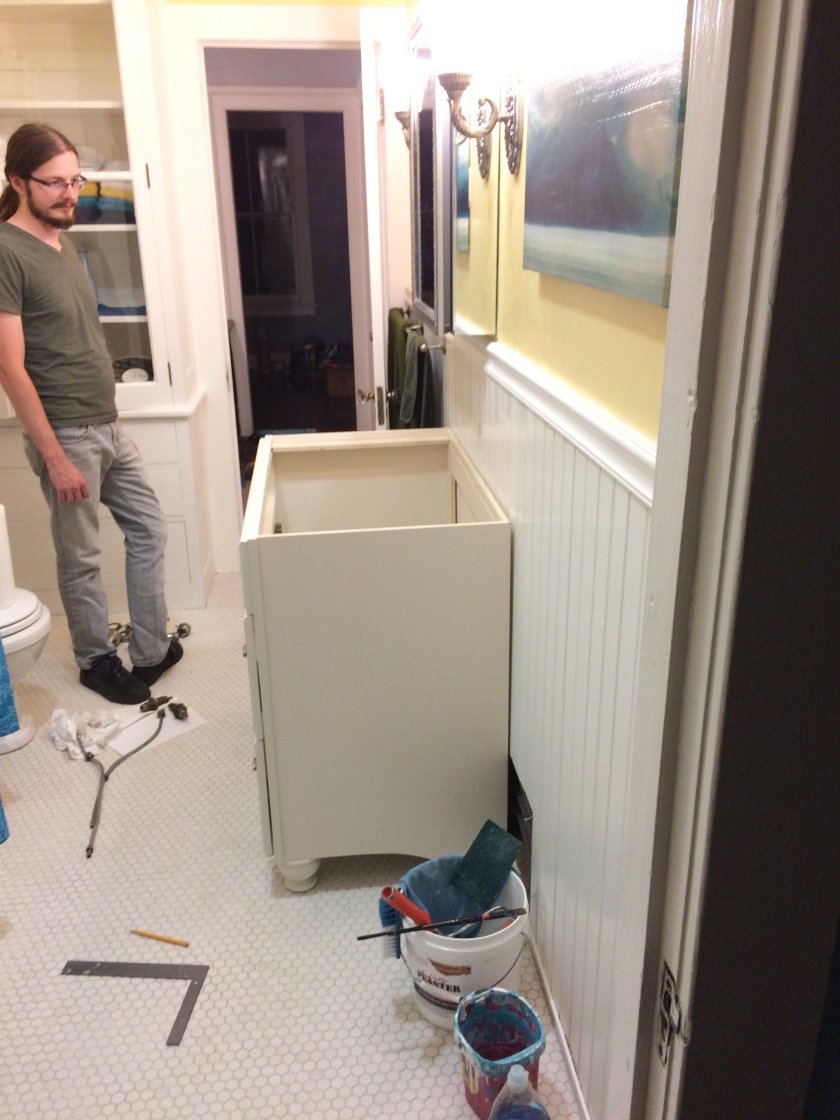
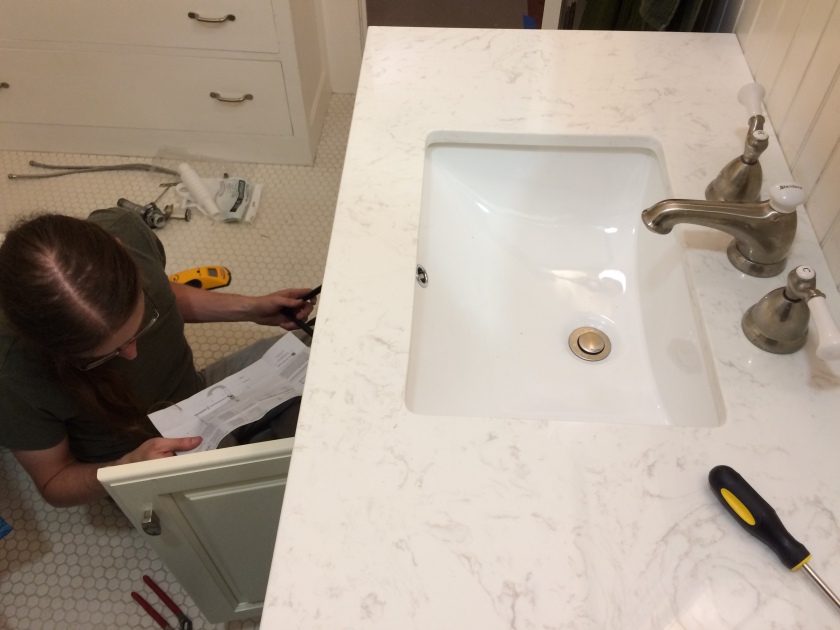
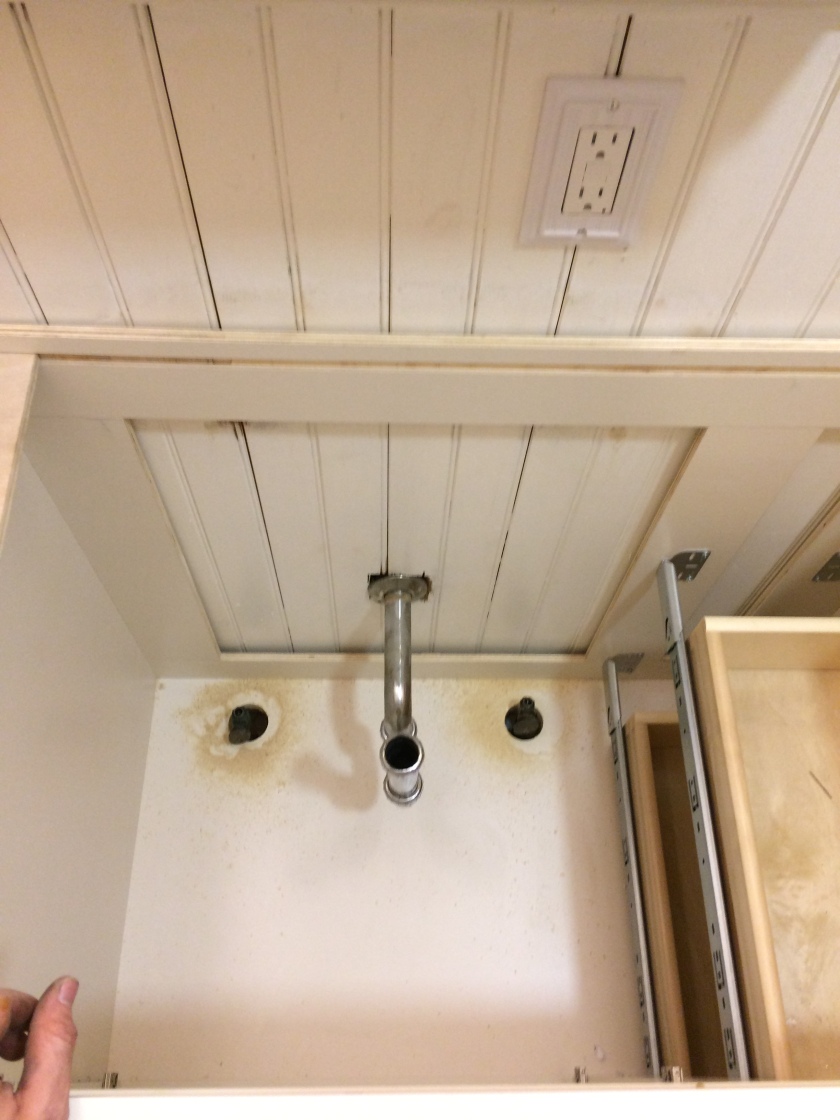
They were careful and methodical and with only a couple of small mishaps (don’t count the number of extra holes in the bottom of the vanity while we figured out exactly where it should go), soon we had a new sink.
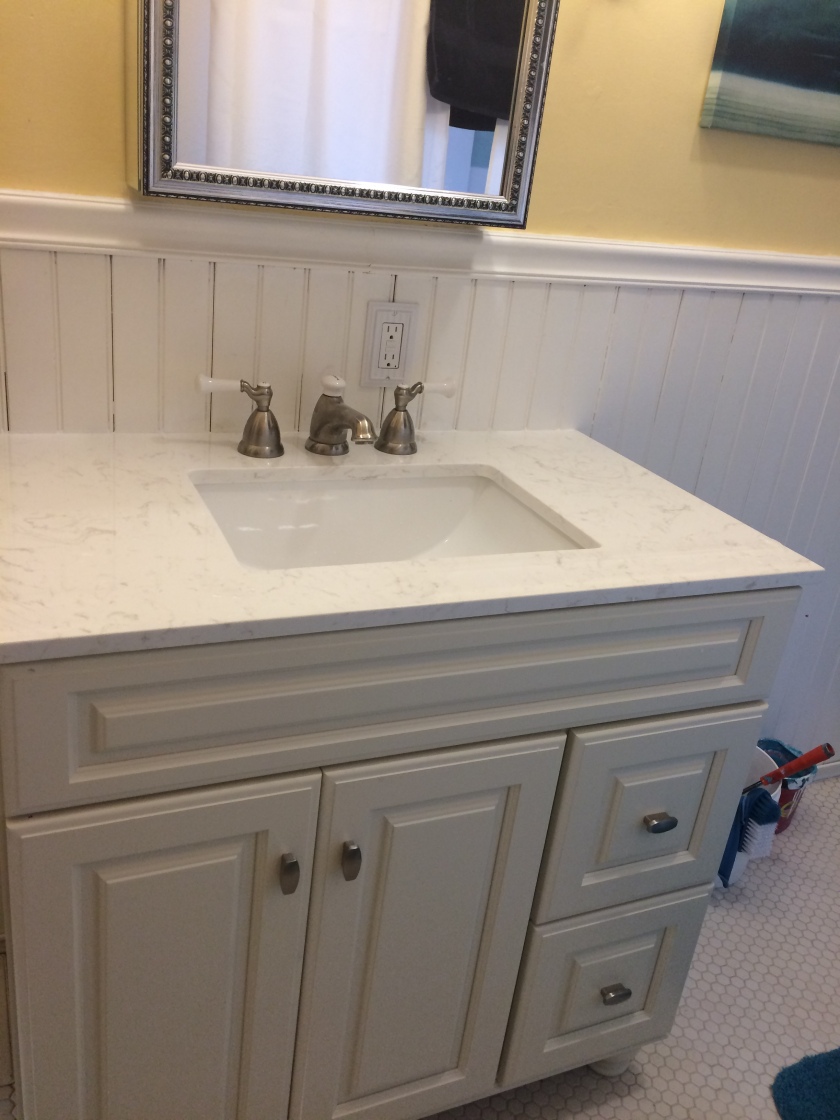
It feels large and overwhelming, but also spacious and freeing. I think I just have to get used to a normal sized vanity. I mean, it still only has one sink in it! We haven’t had a vanity nearly this size since we moved out of Florida. I’m excited!
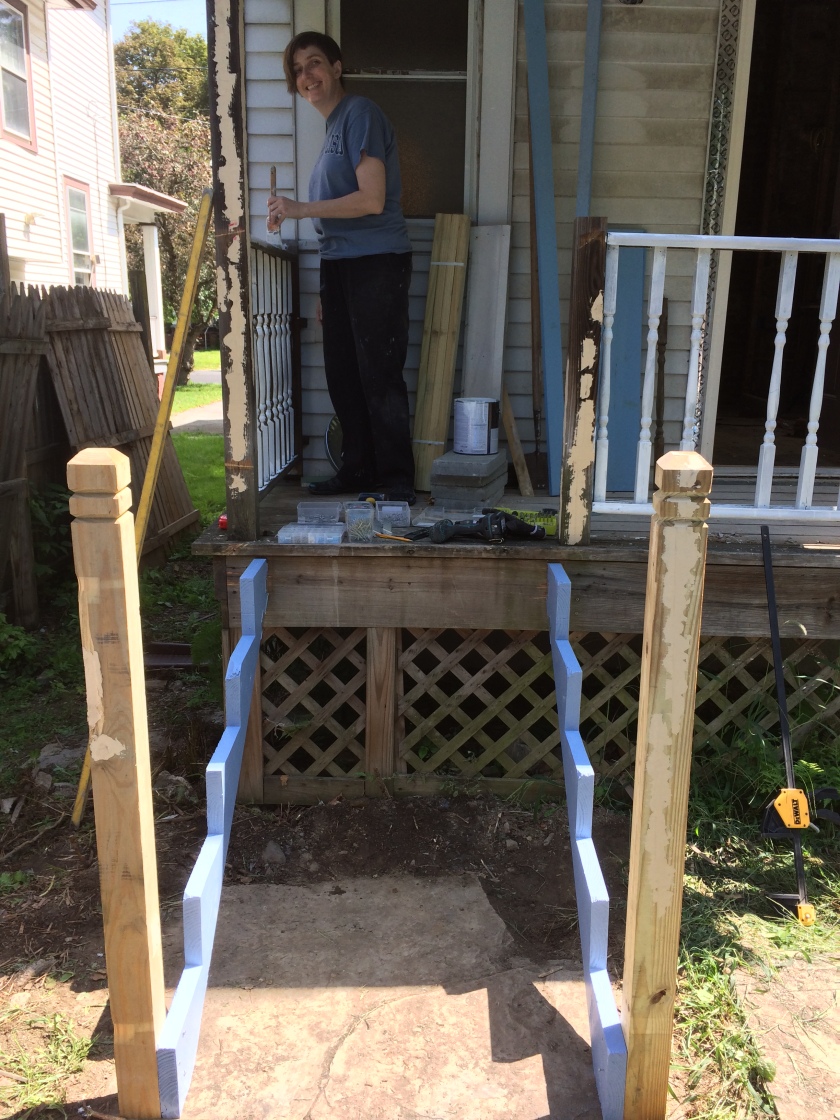
Sunday was the last day in the house and we wanted to make the most of it. We all agreed that it’s growing tiresome to have to jump down from the back porch, so we put “install back porch stairs” on our list.
I worked on priming and painting the parts of the stairs, while Steve and David worked on preparing everything for the project and cleaning up the kitchen area and basement debris from all the demo (SOOOOO glad that the demo is done!).
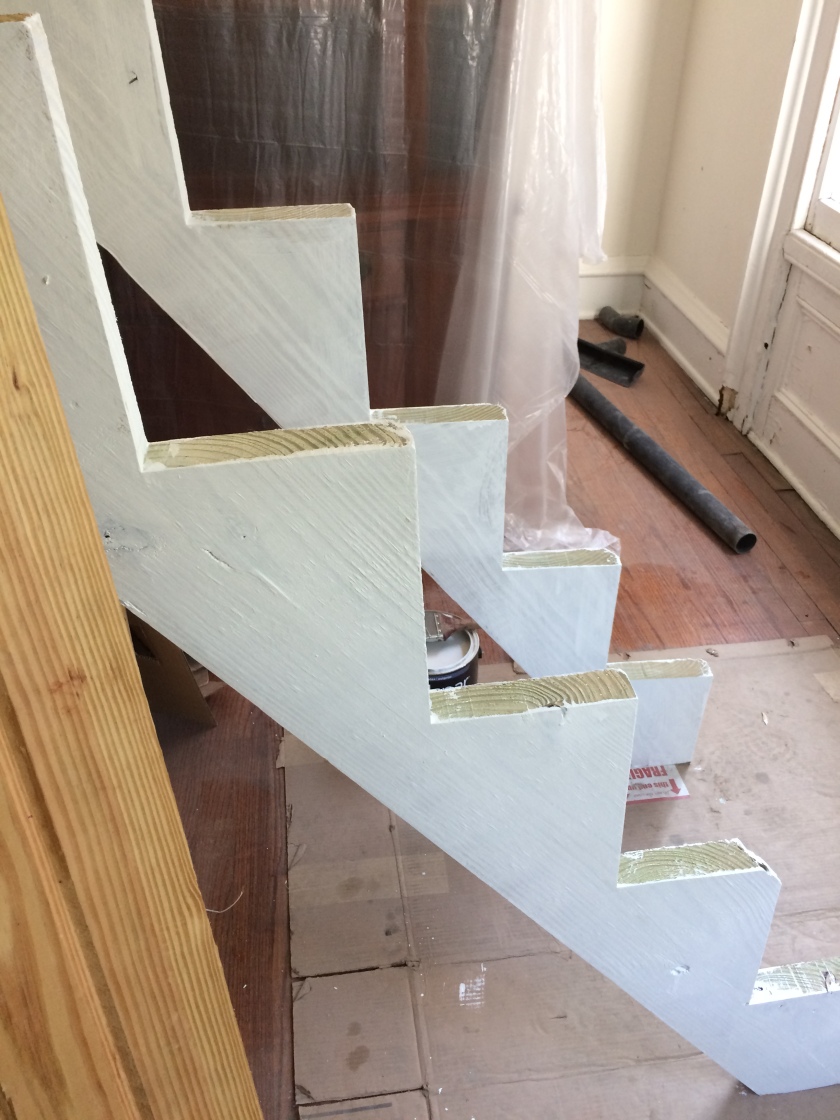
While I was working, Jason stopped by to work on the kitchen subfloor and came over to take a look at what I was doing. “Whoa, that’s a really steep set of stairs,” he exclaimed as he watched me painting. I laughed, thinking he was making a joke about how I had the stringers set up. But no, he was serious–the stringers were too steep. But how could this be? We bought them from the hardware store; surely they wouldn’t sell us something that was designed to not meet building code.
We both looked at the stringers and then measured them. As Steve came around the corner, we shared our concern with him. He took one look and said, “April is painting them upside down.” Because, of course I am! It’s my Polish nature–if I can find a way to do something backwards or upside down, I will definitely do it that way. Ha! Well, that was an easy fix.
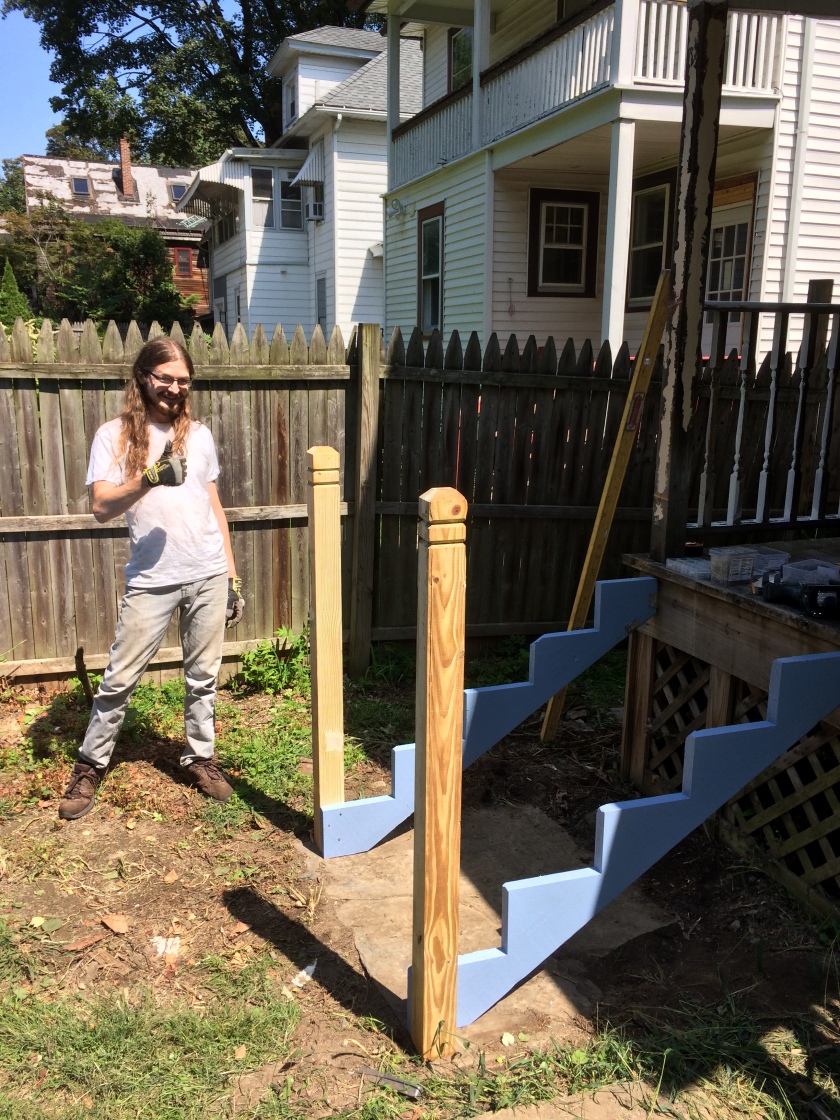
After painting the stringers, we all moved outside to install them, while Jason was working in the kitchen. David and Steve worked on securing them to the porch and to the posts at the bottom of the stairs, while I was busy painting the existing spindles on the porch railing.
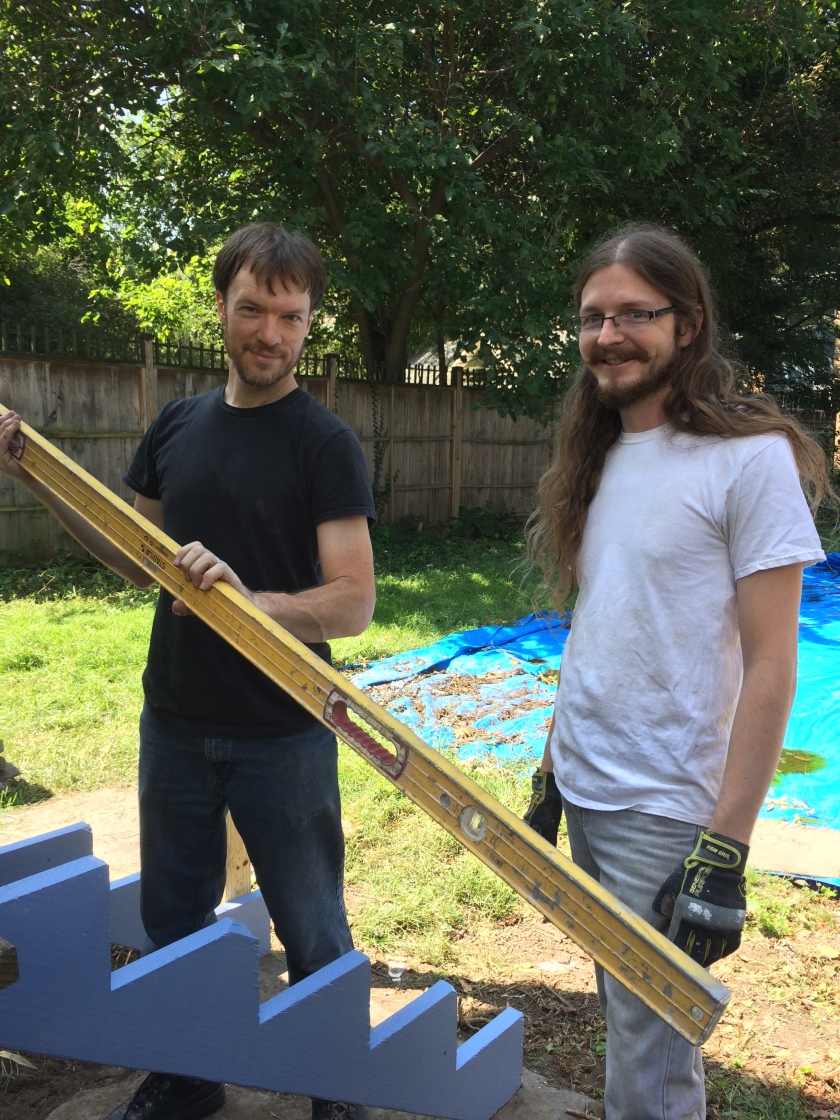
When Jason came out for a water break to check up on us, he had bad news. We hadn’t done our math correctly. You’d think we would know better by now, seeing as this is the third set of stairs we’ve worked on. The number one rule in building stairs is making sure the height between each step is the same, including the step from the ground to the first step and from the porch to the first step. We had a problem at the ground level: it was 1.5 inches off. No way to fix it.
Jason offered to build us custom stringers to fit this space. We gratefully accepted the offer, even though it meant we wouldn’t get the back porch stairs built today. So, I had to go to my cool down place to decompress from the frustration of spending the better part of the day wasting my time and our extra set of hands on a project that now has to be completely redone.
Over lunch I had time to calm down, and after lunch we proceeded with a different project: finally installing the 46 soldier spindles on the front porch….or at least half of them.

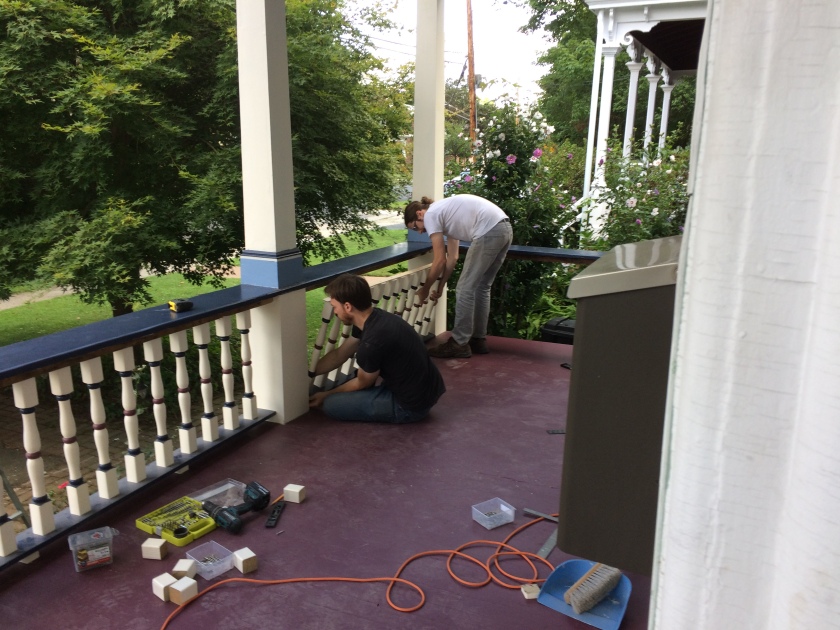

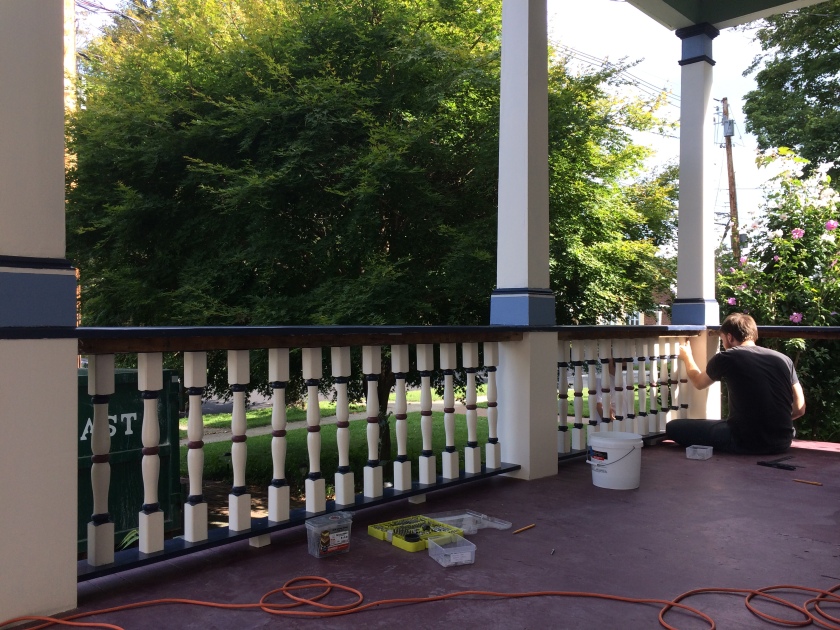
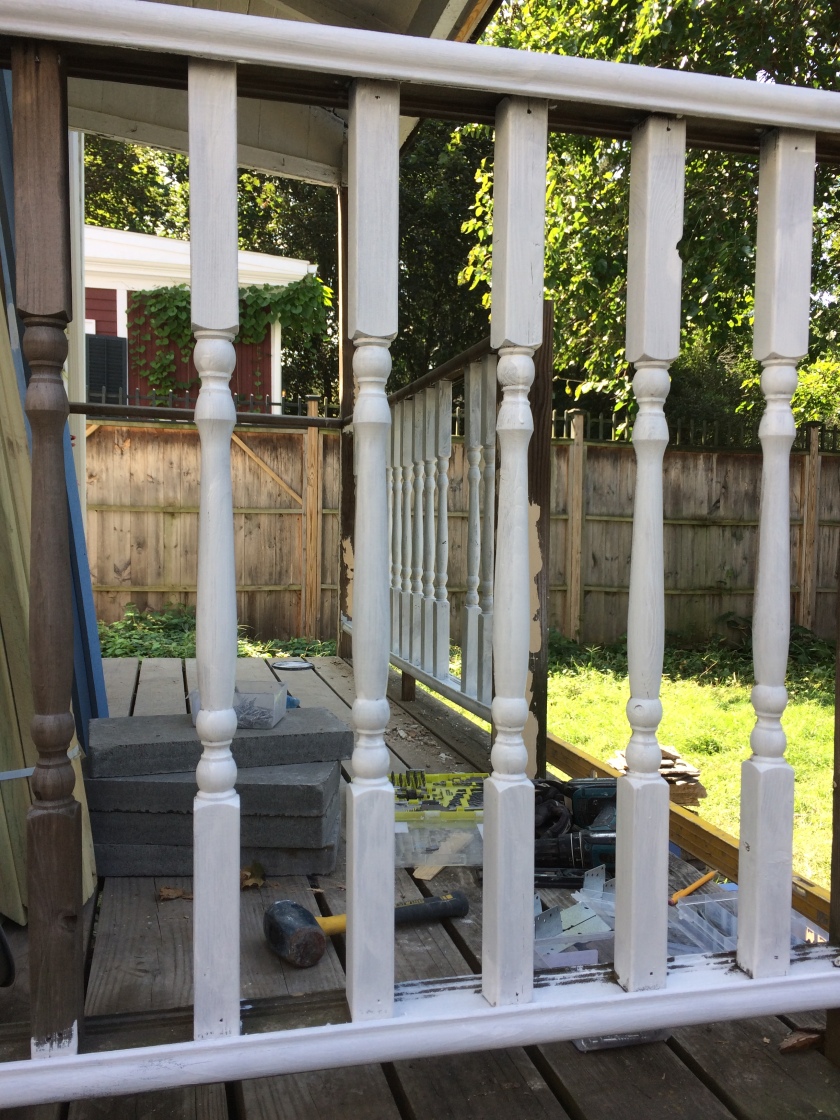
While Steve and David figured out that project, I worked on painting the spindles on the back porch. It’s amazing how much just a coat of white paint can help turn something from looking like a tear down part of your house to something that looks like a finished part of the house.
By the end of the day, we felt we had made some serious progress on the house project:
- Kitchen fully demoed and ready for rehabilitation
- All walls on the second floor painted. Just a few more ceilings to paint and few light fixtures to install, then Phase 2 of the second floor is done!
- New bathroom vanity installed
- Painted back porch spindles
- Installed half of front porch spindles
Not too bad! We’re looking forward to this upcoming weekend, where we get to spend an extra day at the house working. Thank goodness for Labor Day! Hope your plans are as fun as ours. 🙂

Oh my goodness – you and STAIRS!!! And the master bedroom unmatched paint. And shimmed subfloors. So much fun!! Well the stories you have to tell are funny as all get-out (at least after the fact). These great stories will be told and re-told over the course of your lifetime. These are the “bread and butter” of life, the stories that add character to our otherwise dull lives. I can see in my mind’s eye one day in the future sitting around a firepit in your backyard, telling these stories to each other – “Remember when we painted six coats of paint in our bedroom? And remember when I tried to put the back porch steps on upside down!?” These are stories that you will one day laugh about. Thanks for putting this blog together for all of us. We are enjoying your project with you, inch by inch!!
LikeLike
That sounds EXACTLY like what we will do one day in the future. In fact, we already had a “walk down memory lane” when thinking about the basement last winter. I’m glad you are enjoying the blog.
LikeLike
“Only” 6 layers of paint? It was worth it to get it to match up. I love your colors. And “Jail cell gray” is all the rage right now! No, it isn’t too much like a cell. With all of the colors in the house, a nice neutral color is good to separate. The floor demo was sorta a happy accident to prevent figure issues. So glad you found all of the “repairs” to be able to fix them properly. Don’t get frustrated if something goes wrong, you don’t do these things every day. You guys are really doing an awesome job! I’m super jealous. I know that if I did this sort of project w my husband, he’d rush through. So glad to see the triple measurements from your other half. Lol. It’s worth the patience and extra time. AND I LOVE THE FRONT PORCH!!!!! *high five*
LikeLike
Yay! Front porch for the win! Thanks for the encouraging words, jess. I’m trying to work on my ability to take a first round failure as a learning experience rather than a “failure.” Still have work to do on that, as you can tell. Glad to hear the vote for the positive on the paint colors. Our neighbor called them “a bold choice,” which I wasn’t too sure was meant to be a compliment. But, as long as WE like them, right?!
LikeLike